RSVP requested by September 1
contact Debbie Arcaro, Lauri Troutman or Cheri Nixon directly or email: tinpedlar@maine.rr.com / comment here or on our Facebook page
RSVP requested by September 1
contact Debbie Arcaro, Lauri Troutman or Cheri Nixon directly or email: tinpedlar@maine.rr.com / comment here or on our Facebook page
May’s meeting saw the completion of this year’s challenge to the group: A Postcard from Maine. (For the few members who could not be present yet participated in the challenge please bring in your challenge mat at the June or Sept. meeting.)
At the inital introduction of the challenge there was a lot of buzz around our state bird: black-capped chickadee.  (Jackie Hansen)
We wondered how many we’d see once all the mats were completed? If not the chickadee what would members design and hook? With the sharing of the completed mats the variety was wonderful. Hearing the stories for the choice of design added another component. (Look for a later sharing of these.)
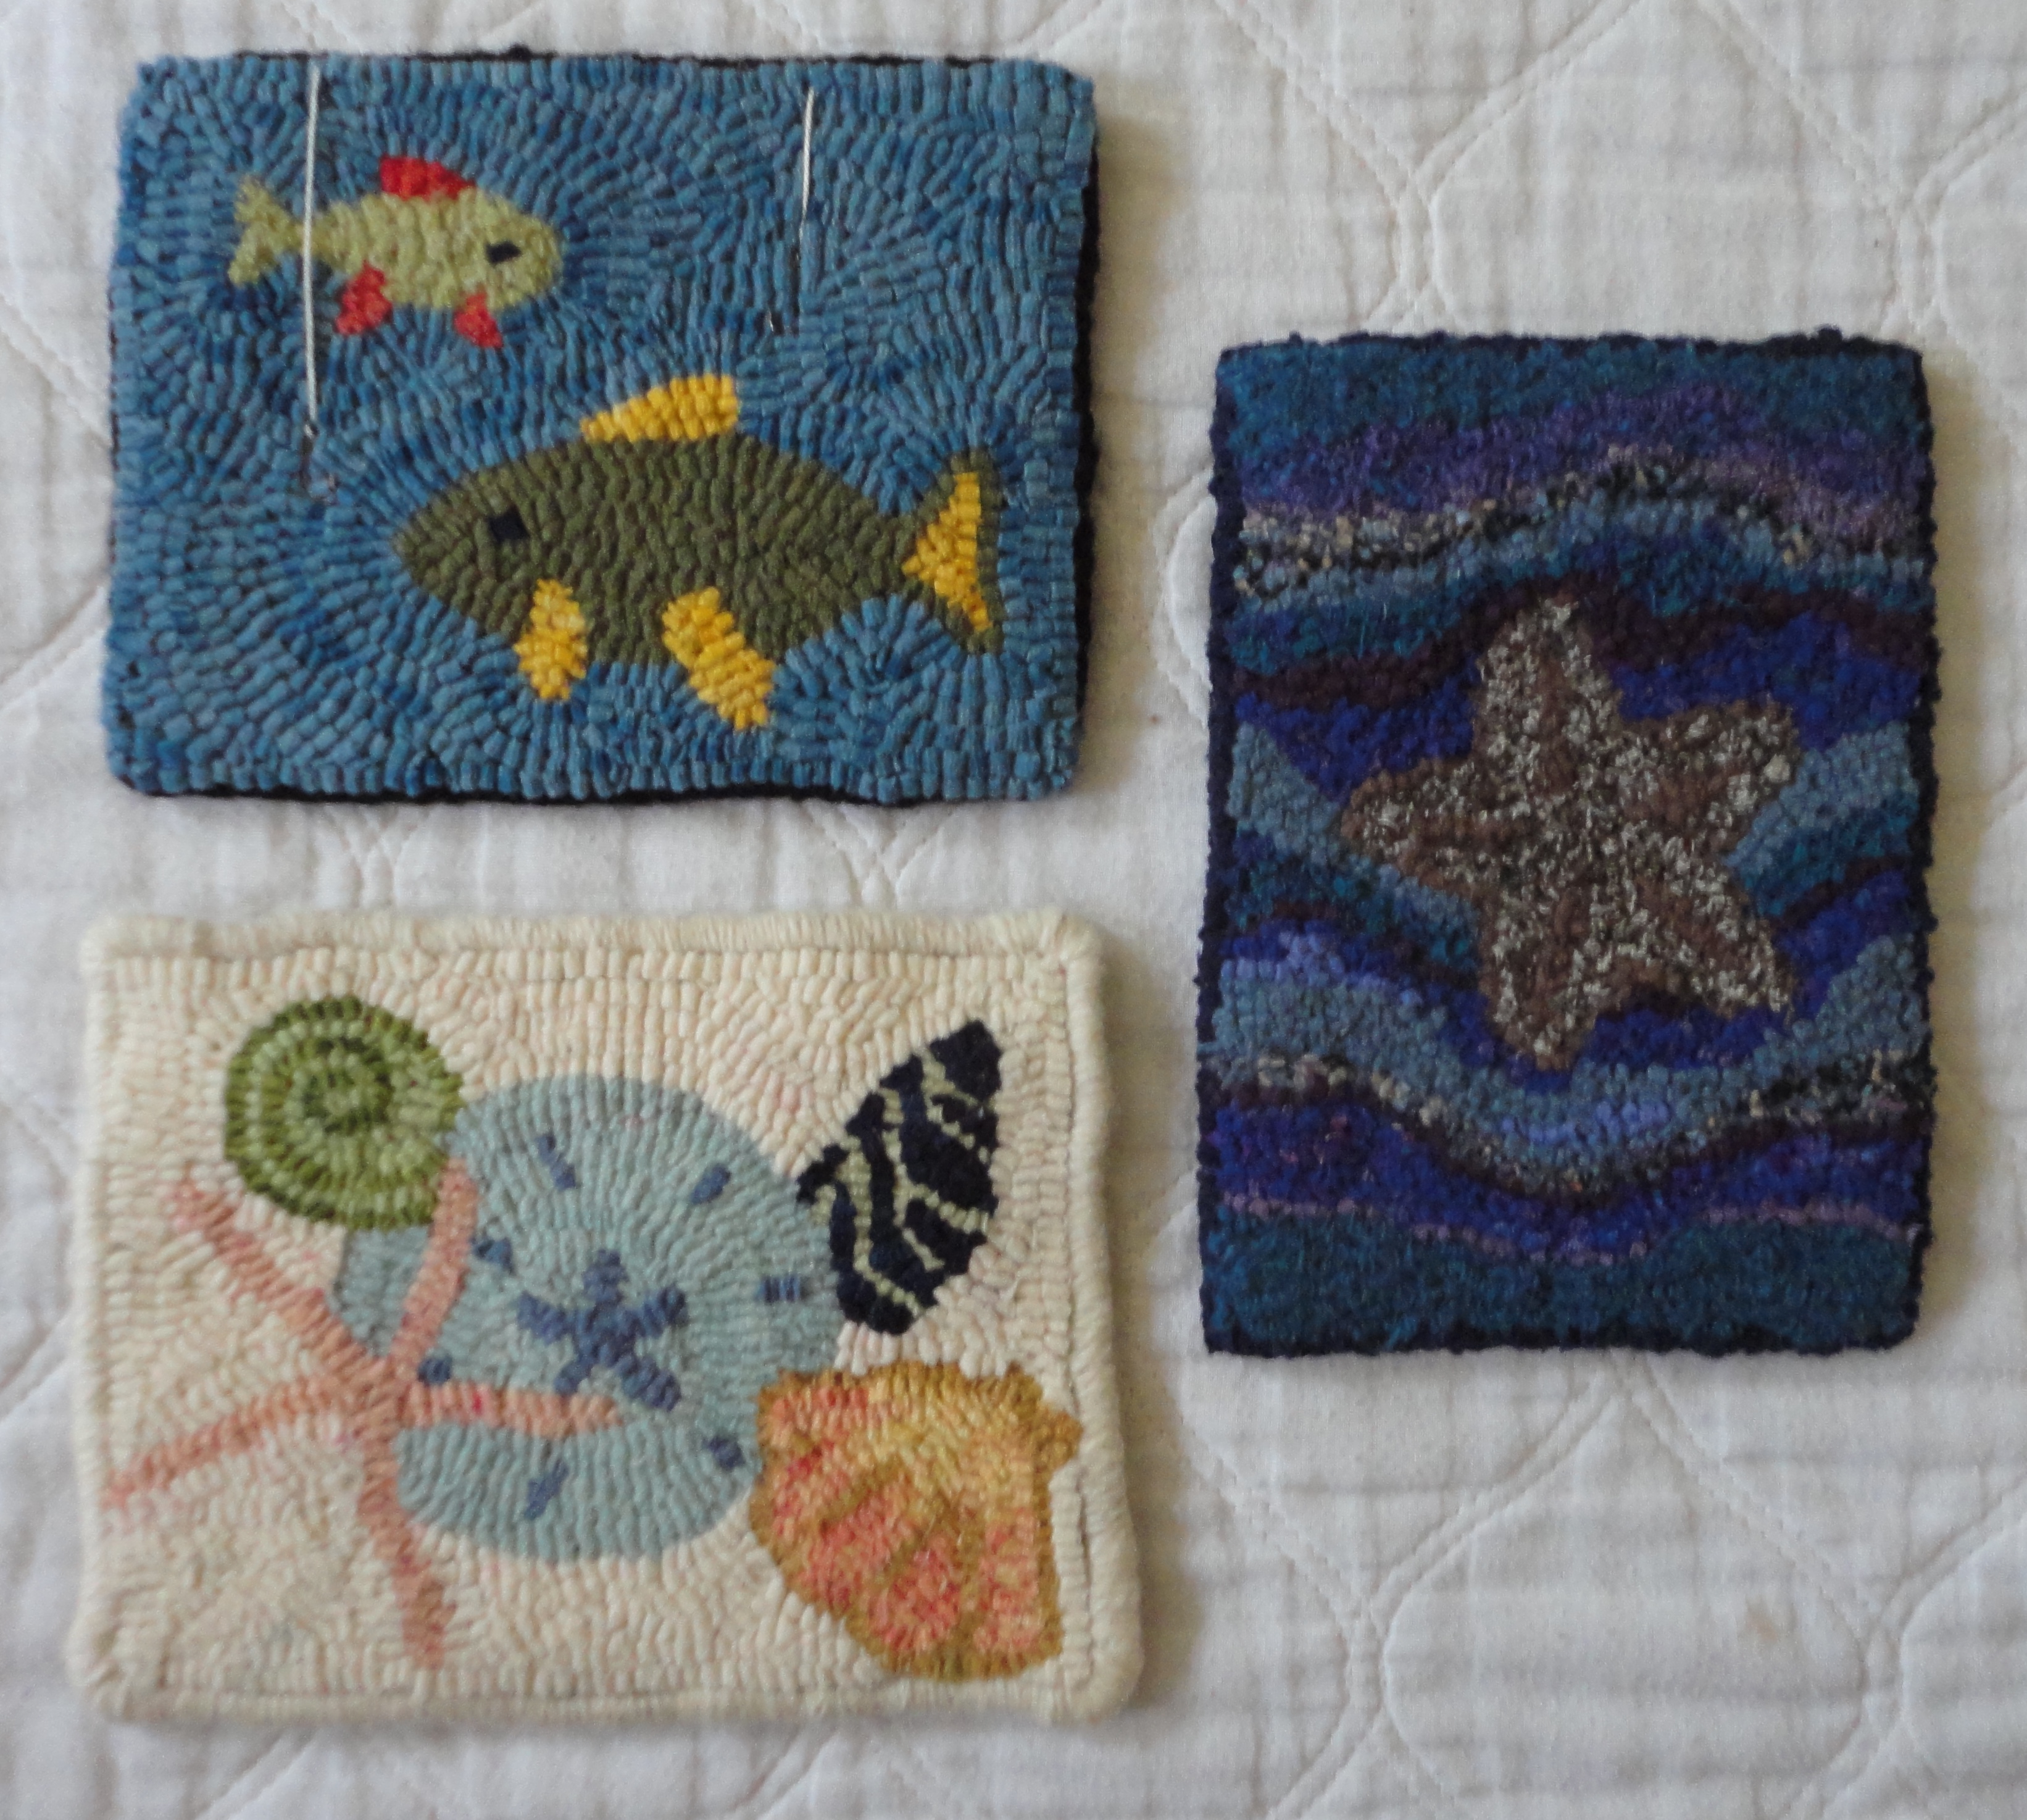
Here are the mats that were shared during the May meeting. (Owners are labeled clockwise starting at upper left.) * Copywrite protected – Please do not copy any of these designs without requesting permission first.*
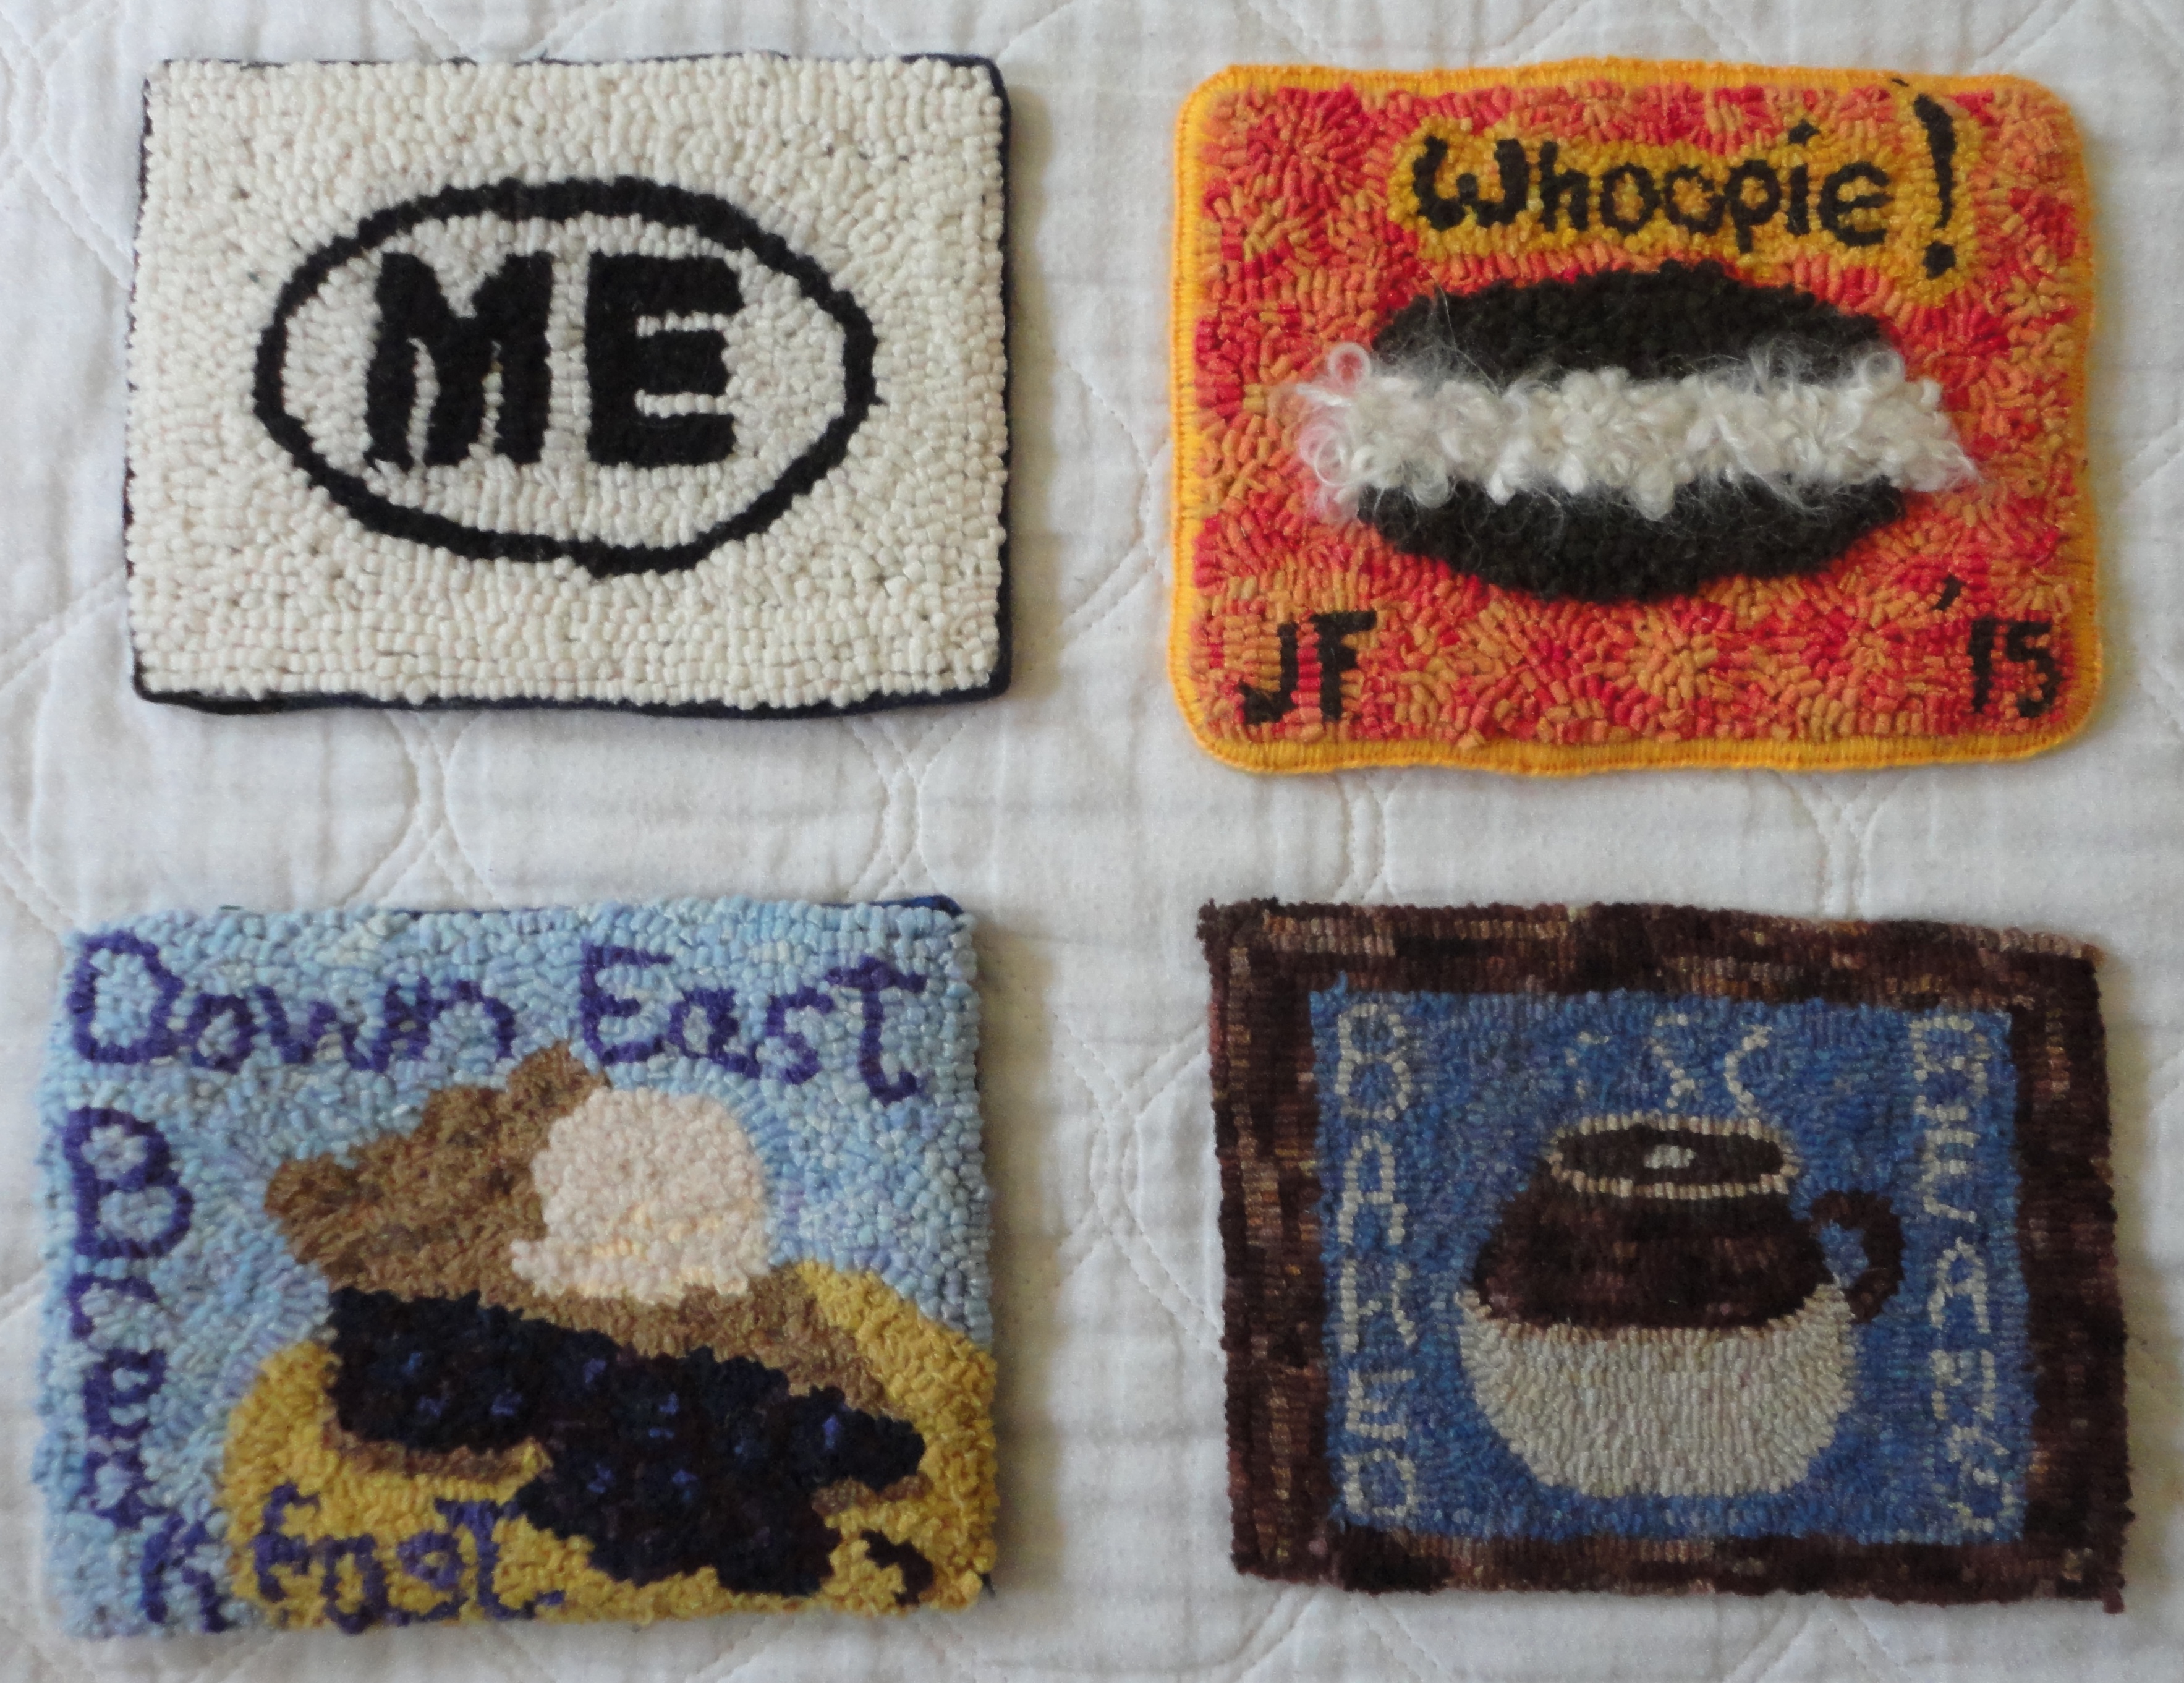
1) “Maine Symbol” Priscilla McGarry; 2) “Whoopie!” Pat Ring; 3) “Down East Breakfast” Jeanne Voorhees; 4) “Baked Beans” Natalie Sanborn
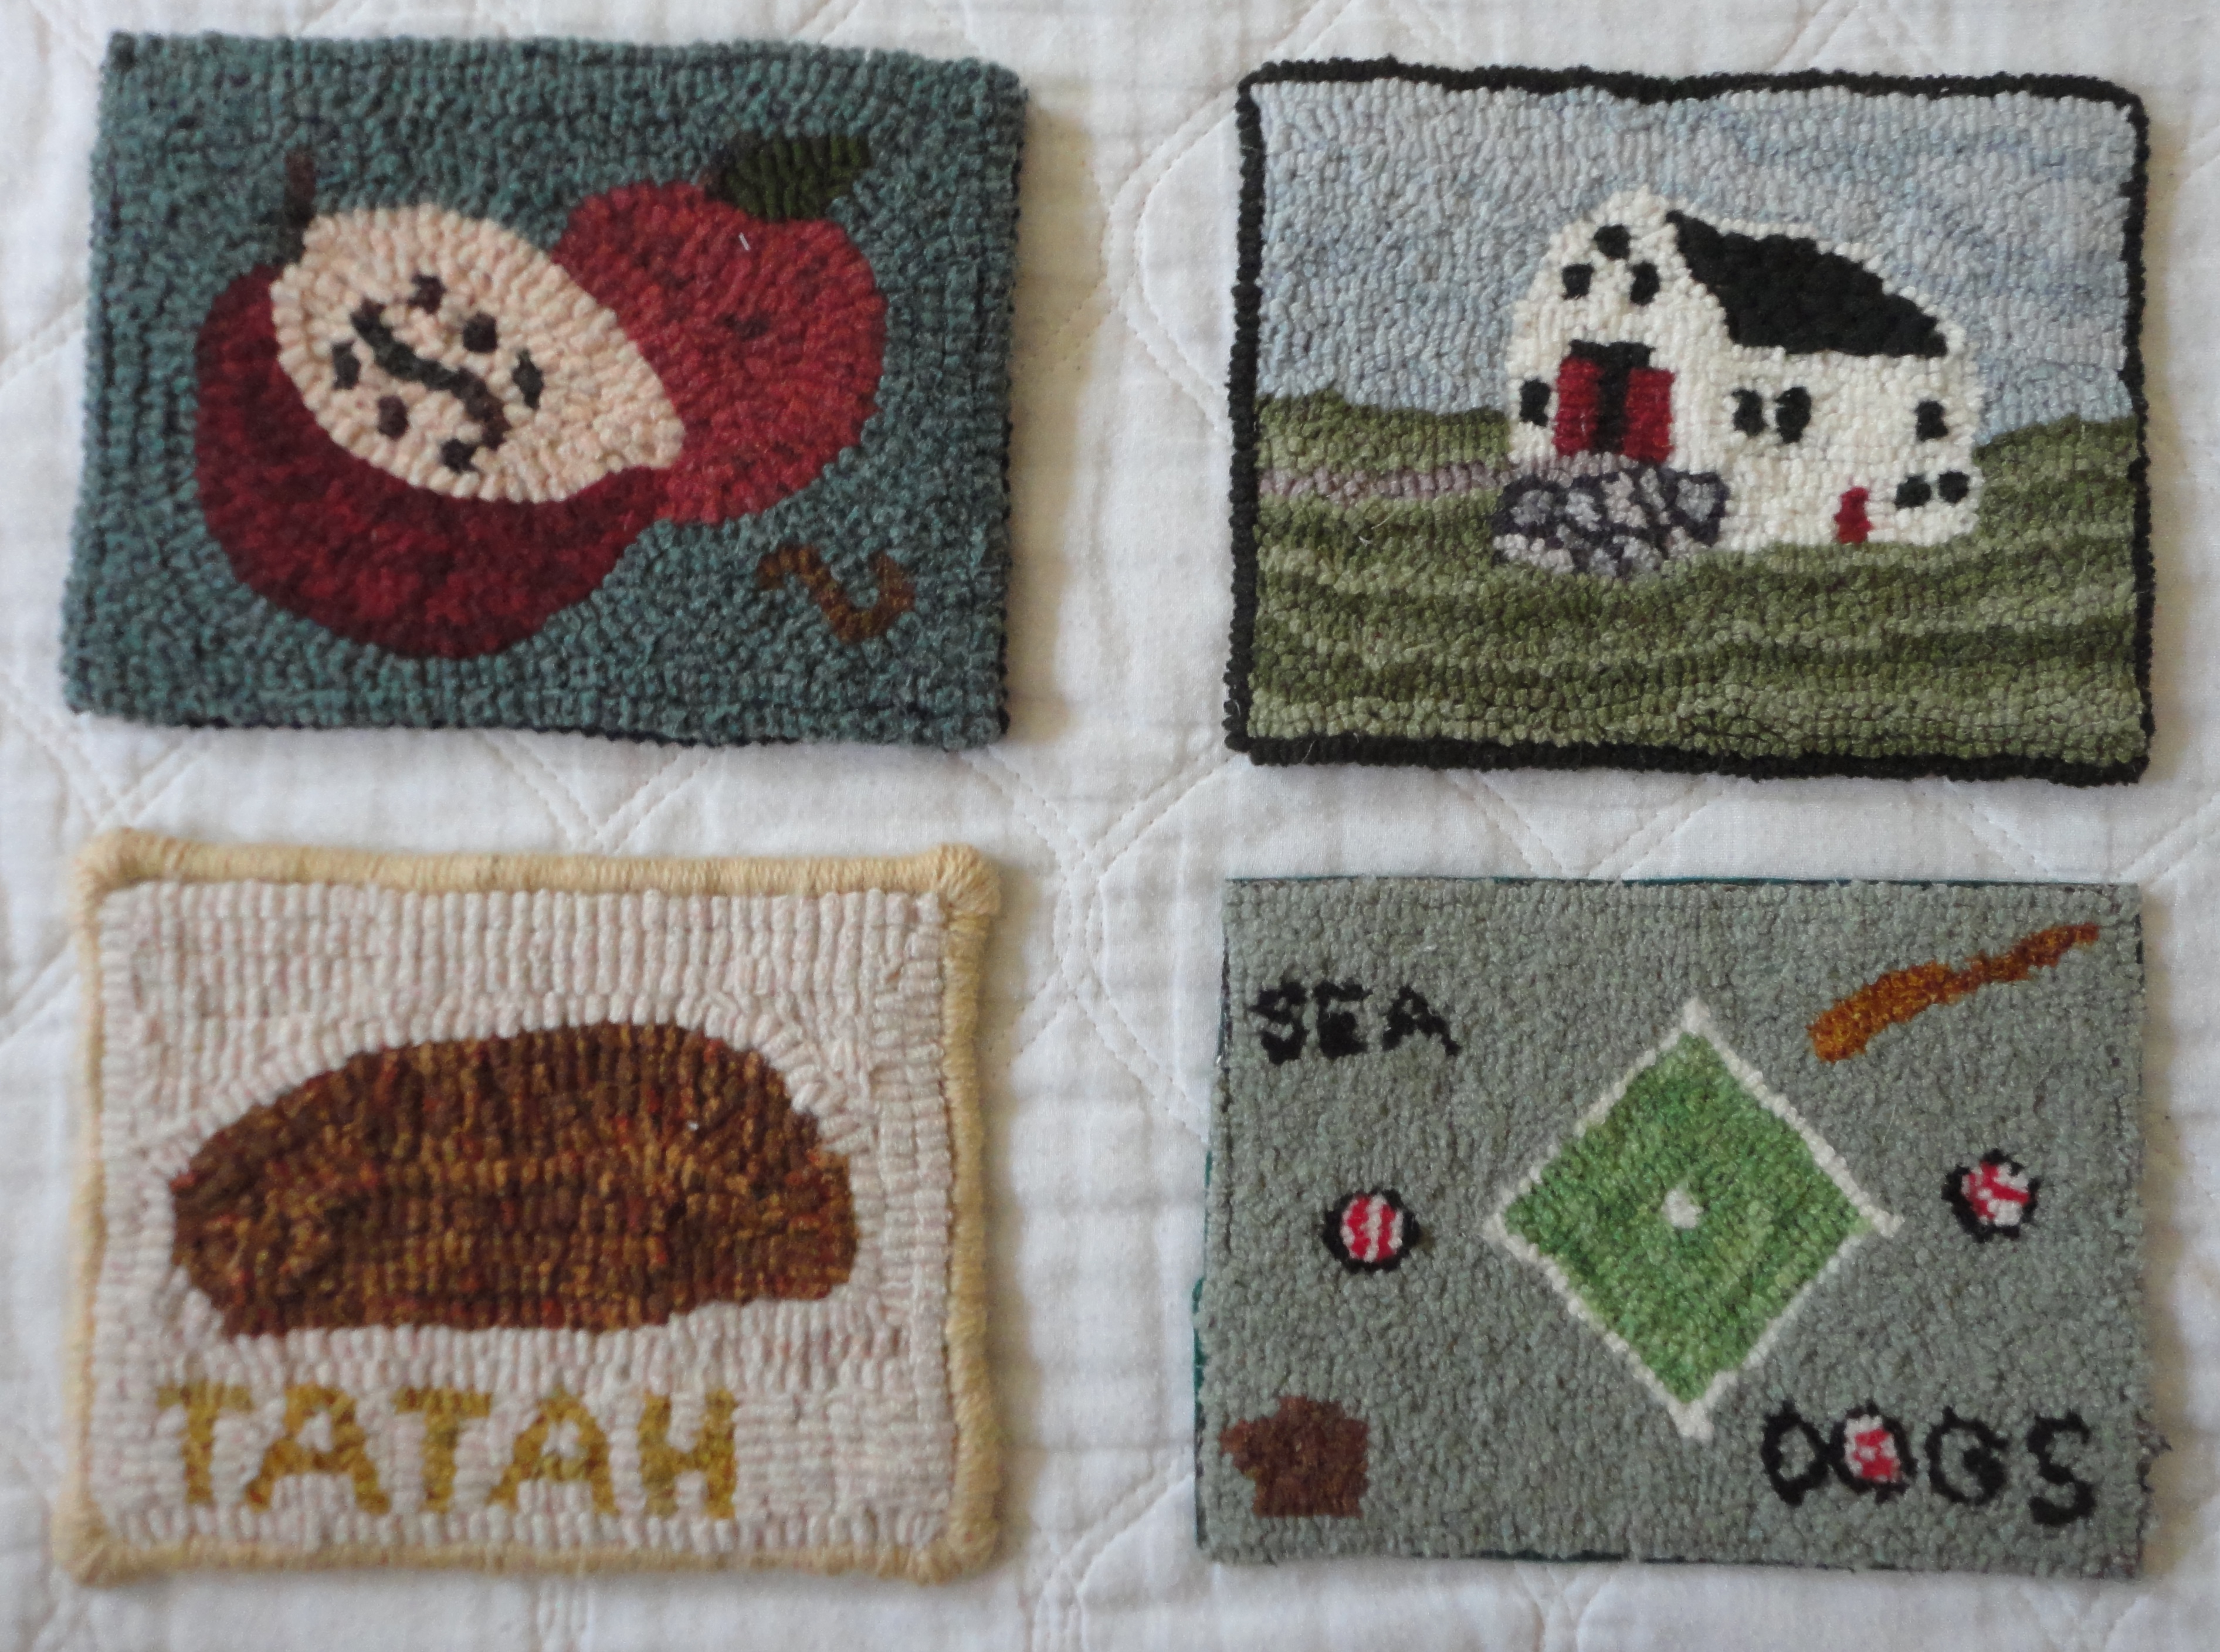
1) Terry Parent; 2) Harriet Johnson; 3) “Tatah” Bob Galloupe; “Sea Dogs” Norine Bucknell
1) Connie Castles; 2) Joyces Knowles
1) “Puffin” Martha chaput; 2) “Loon” Linda Bradley; 3) Edna Olmstead; 4) Sheila Kilgore
1) “Maine State Bird – Chickadee” Janet Cameron; 2) Trudy Winne
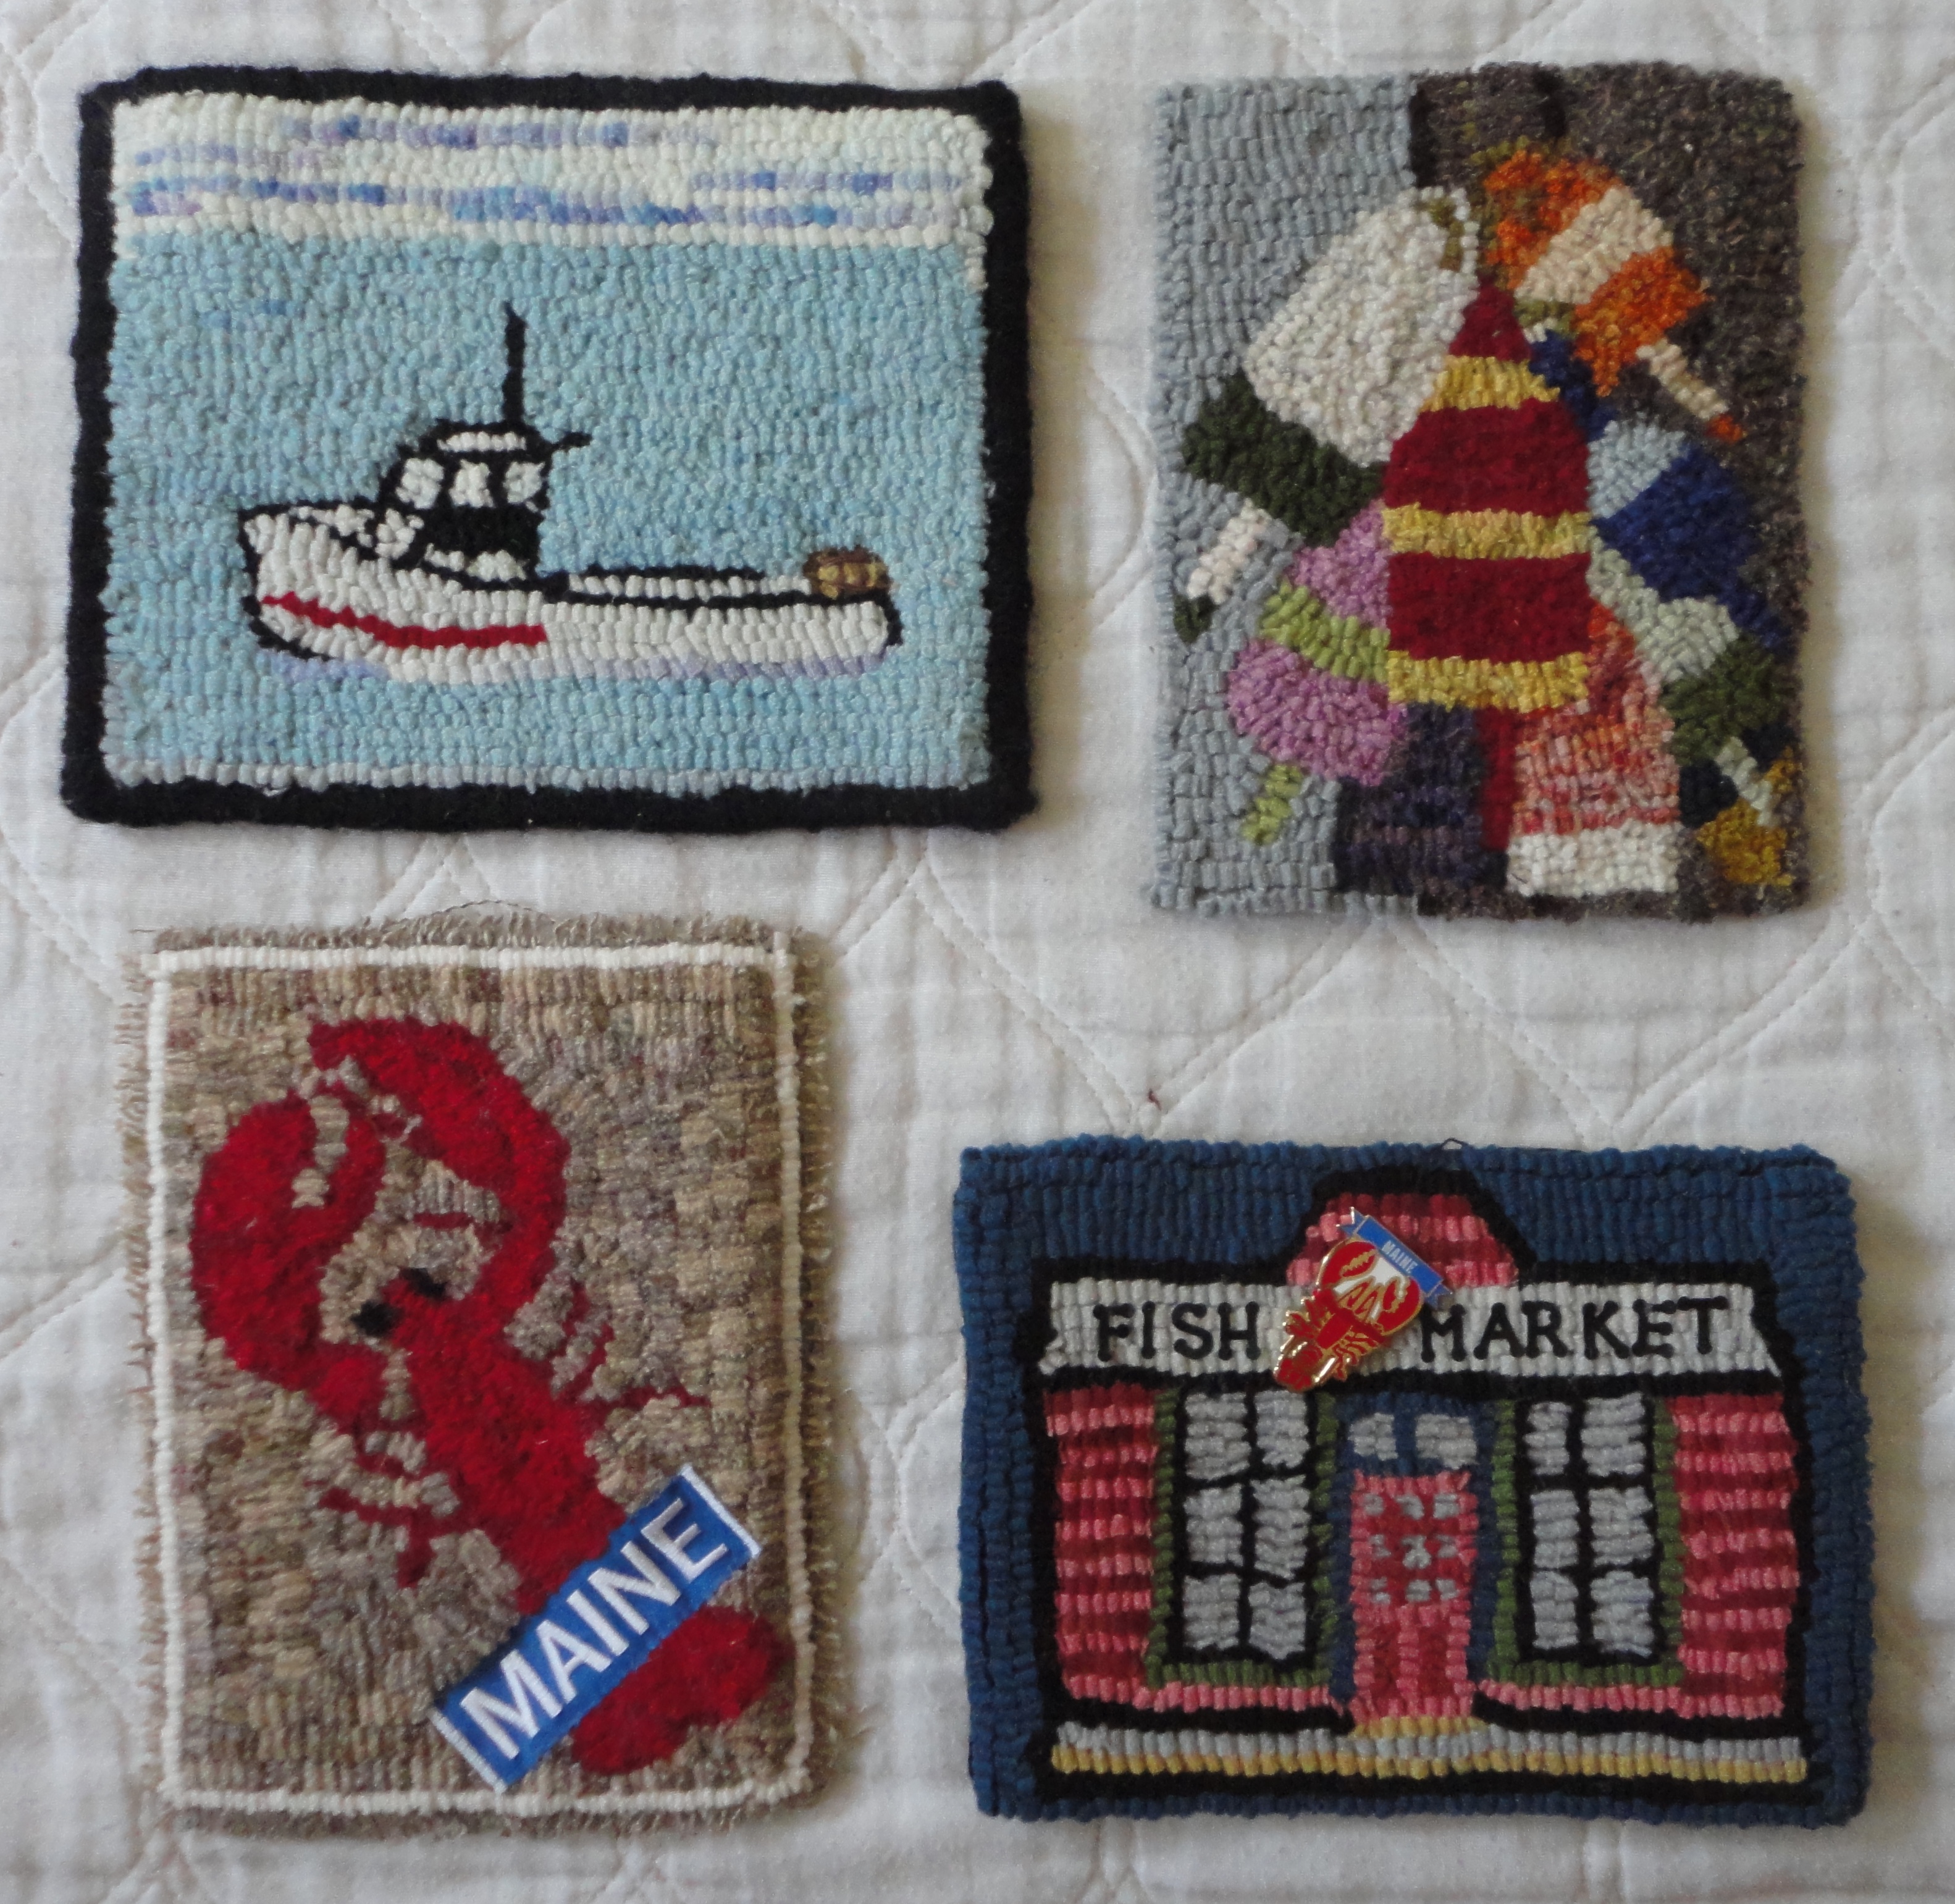
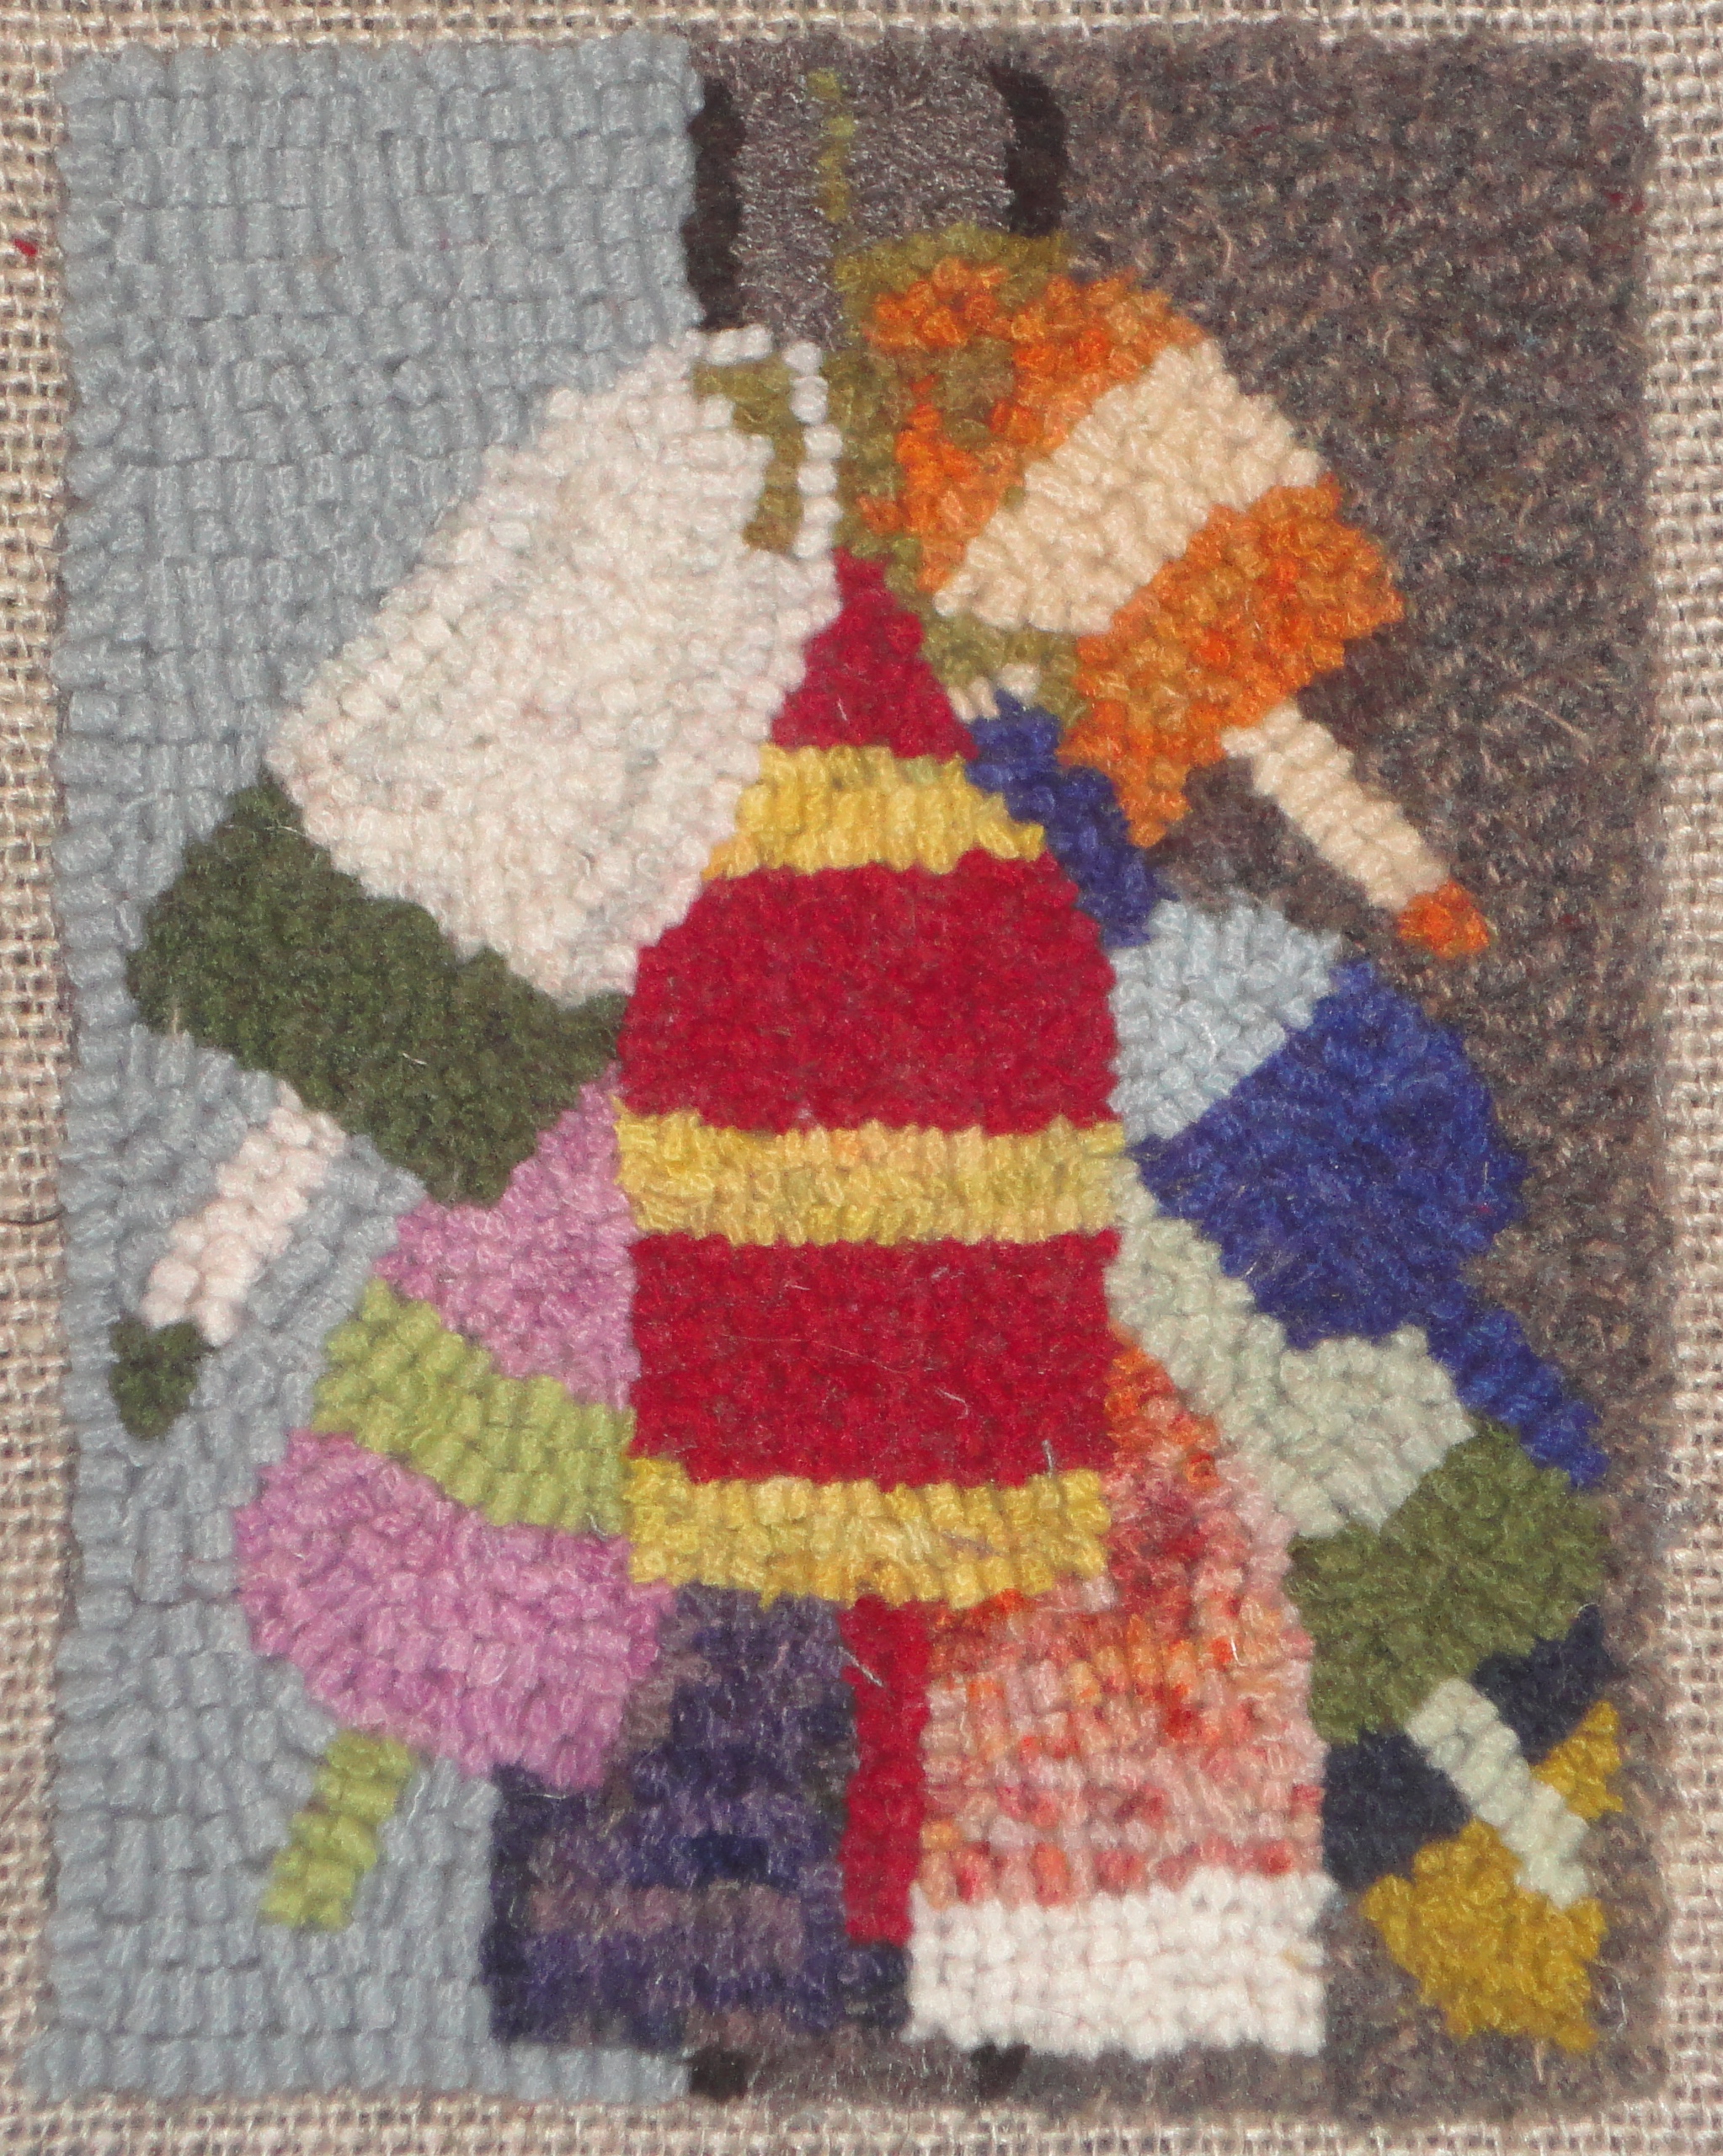
1) Daisy Higgins; 2)”Buoys” Deborah Arcaro; 3) Joyce Goff; 4) “Fish Market” Patricia Connors
1) Ann Galloupe; 2) Kathleen Newell; 3) Trudy Brown

1) Ann MacIntyre; 2) “Chowdah” Chris Antonak; 3) “Weather-beaten” (by Winslow Homer) Bailey Ruckert
Jon’s presentation in Feb. 2014 was to walk us thru the process of creating great shading and dimension in our fur or feather rugs. As a side bar members were encouraged to bring in any rugs they had hooked with fur or feathers. (Some of those rugs are pictured within this posting.)
 Jon started rug hooking because he was looking for a hobby. His wife suggested a visit to an area shop. When Jon visited and was told one could learn to hook in five minutes, he bought a kit and started. Jon is what many of us would call “self-taught”. After about 4 years he took his first class. At the class it was suggested that he begin teaching. His first weekend class had 19 students. They were spread throughout the facility which provided its own adventure. Jon has continued to present workshop since then.
Jon started dyeing wool when kits he was purchasing didn’t have the colors he wanted to complete the design.
Jon has no formal art background, but he saw a huge amount of the world through flying with the Air Force. He started to draw his own patterns, so he could have the design to hook that he wanted. Since he started hooking Jon finds he is noticing more details of the surrounding natural environment and animals. He notices the variety of colors present, which shows in his pieces. Knowing the habits of animals for eating etc. helps when you are hooking as you are more awareness of special features.
Following are details that are important to become aware of and bring into your hooking to make it more realistic.
 Start by being aware of the light source direction as that provides your shadows. Shadows go from darker color to lighter to provide depth.
Fur:
 ooking fur think about direction fur going on the animal you are hooking. Hook in that direction. Our eyes pick up ditches in the hooking. Hook in the direction that you would pet that animal body part.
Feathers:
Eyes:
 In cats eyes when the light shines on them the pupil constricts to a vertical streak/line.
 Not all eyes will be whole. It will depend on the head position and direction the creature is looking. It will also matter on where the eyes are naturally set on the head – front or side – prey will be on the side (squirrel).
General Hooking Tips:


 Beverly joined us in April 2014 to demonstrate different finishing techniques that she has used over the years to finish hooked pieces.
Following will be a compilation of the tips I picked up during the presentation.
When using a binding start by pre-sewing the binding at what will be the finished edged of your hooked piece. This allows you to hook right up to the binding.
Baste down the edges of your binding to hold out of way.
When done hooking flip over binding and hand sew down.
You can leave the binding plain or whip.
Beverly likes Cascade yarn for whipping as there is no pilling. Use single thickness. No cording required, but pay attention to the thickness of your finished edge.
She suggests that you mix yarn colors to work with a plaid background
Stretcher bar framing:
 Start by taking your finished rug to the store with you to get the correct sized frame pieces.
Cover the bars with wool. Wool piece lays across frame and wraps around the frame bars. Can sew or staple in place.
Then sew rug in place across the top of the frame and slightly around each top corner. This maintains position and shape of rug as it hangs. Does not curl if sown only at the top like this.
Now cover back of frame with another piece of fabric cut to size. You can use a staple gun to attach this fabric.
Now you can place hanging hardware where desired. Screws go right through the wool.

Pillows:
Back the foundation with fabric if not completely hooking the pillow top/front.
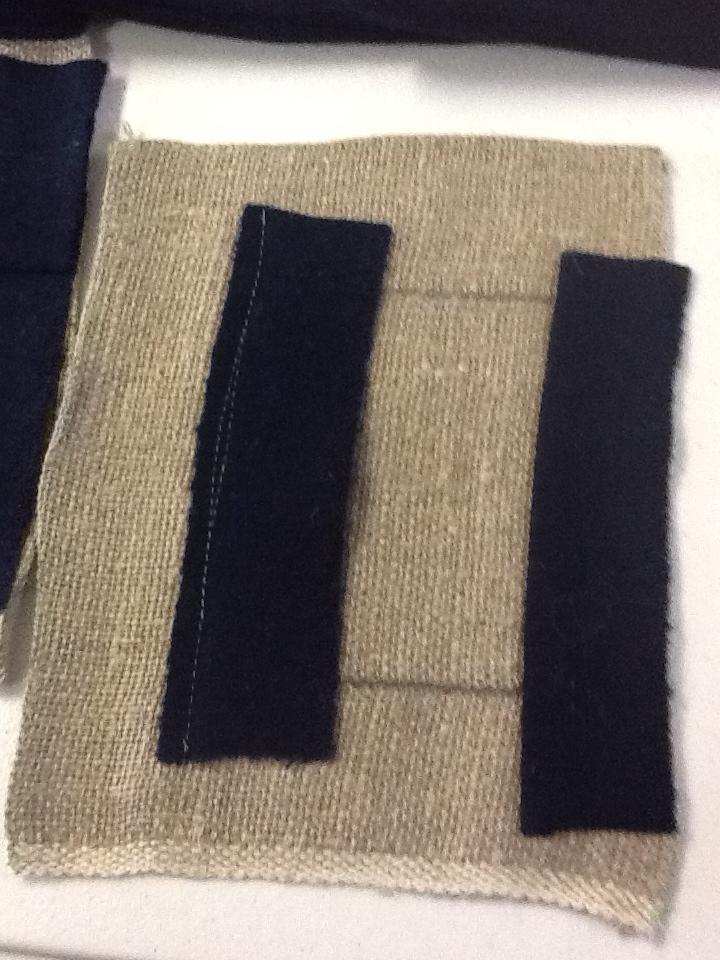
 For a pillow with a wool border get it in place before you start hooking the pillow top.
Cut wool border strips to size being sure to extend beyond as shown in photos below. Sew longest sides in place first.
 Fold back then sew top piece on.
 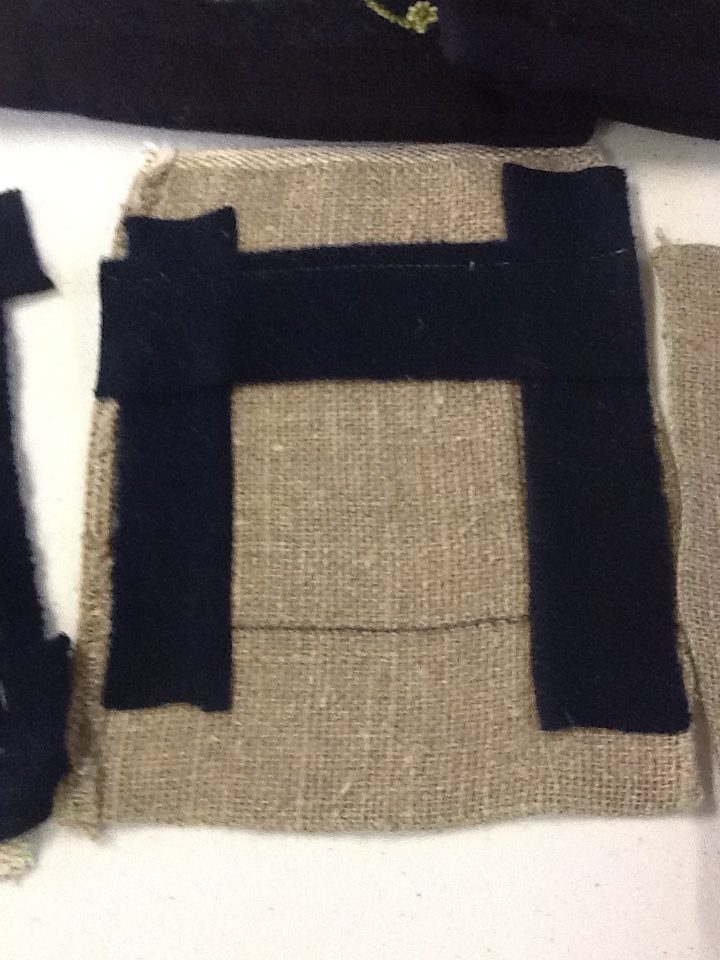 Sew bottom on.

Fold all back and baste, as you would for a binding edge.
To finish you would sew your backing fabric to the finished pillow top right sides together. Leave an opening to turn through.

This technique works great for making mats.
 Finishing round pieces has different issues.
Whipping too tight causes the piece to buckle.
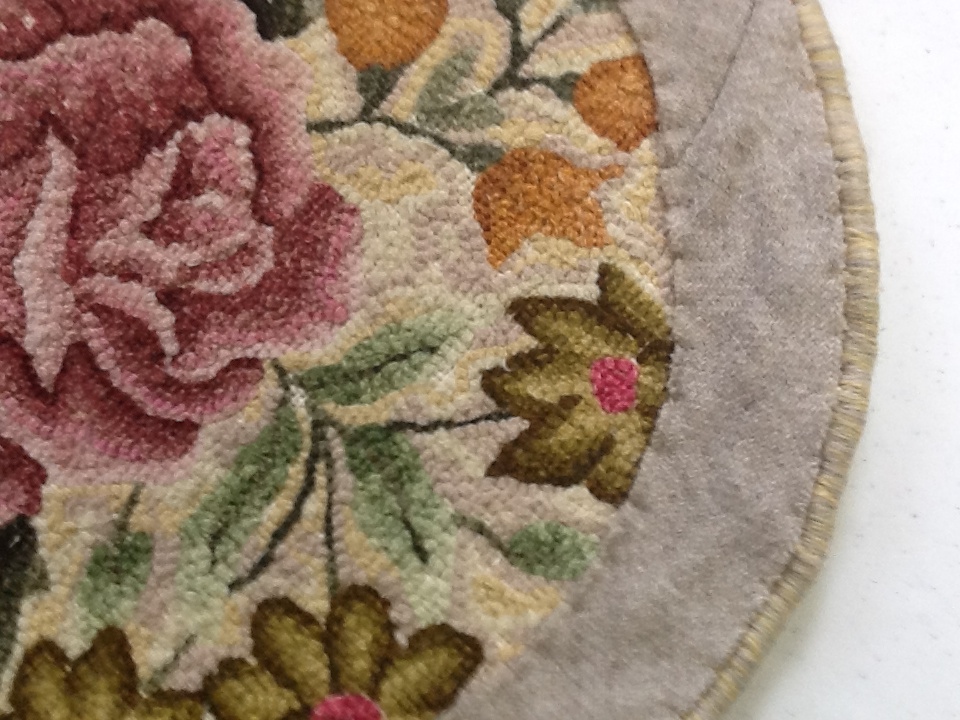
Using bias cut wool that is slightly felted is a nice finish choice, especially for round or oval pieces. Lightly felted wool cut on the bias will not unravel, so does not need to be finished.
To whip finish a round piece fold back, whip with single thickness (thread), then finish with the strip of wool. 
If finishing without binding you want to baste the turned foundation in place. Turn 1/8 to 1/4 and hand sew. Then whip the edge.
Sometimes the expenses of having a piece professional framed is just worth it.
 This unfinished Tote bag. The foundation has a sown edge and will be sown together to form the purse/tote. There is no binding.
Great finish for purses are the purchased metal purse kits.
Usually the posts here are about presenters and information shared or very simple sharing of information on upcoming events. Today, I’m going to write a personal experience story in the hopes it might encourage some others to follow through with their Maine Postcard challenge mat.
I’ll start off by stating that I was excited when I learned about the idea for this year’s challenge at our August board meeting. I had just completed a long fun filled preschool unit on Maine and had a ton of materials on hand to pull design ideas from. Having only bought 2 rug hooking pattens in all over the 15 years I’ve been hooking, I wasn’t thrown by the design side of the challenge. In fact I looked forward to encouraging members who hadn’t tried designing a pattern to do it with this challenge. For me the challenge would be to hook with something less than a #6 cut. I mentioned to another Tin Pedlar about doing 4 designs and making a Maine pillow after having sketching up multiple ideas and not being able to decide on one. Feeling comfortable and confident.
So, it’s 8 am New Year’s Day and I’ve resolved to get more rug hooking done in 2015 and what better place to start than with this challenge mat due in March. Should be quick and easy. Right?

Wrong!
The hooking with very small cuts took a little getting used to, but figured it out enough. Not working with a design that needed too much detail the buoys worked up in good time. Then the trouble happened. As you can see from the design I figured the buoys to be hanging on a cedar shaker sided shed – grays and blacks to depict each shake. This would give a simple texture to the background. Good idea, but not one I could get to work. I tried my grays and black. Pulled the black and tried dark gray tweed. Pulled that and tried dark brown. Pulled it all and rethought the background. (Now these tries were not just a line or two, but at least half the background. On such a small mat, need to hook an area big enough to see what is happening and that means most of it.) 🙂
Tried a few sample lines of browns. Nope!
Maybe straight hooked solid background with a tweed. Nope! but closer.
Maybe diagonal lines like laying on a lobster trap. Nope!
Ok, I have now done more reverse hooking than hooking on a what 4″ x 6″ mat with a simple design. Time to laugh at myself, set the hooking aside and step away. Maybe good time for dinner as it’s about 6:30 pm. (Told you I’d done a lot of reverse hooking.) 🙂
About 9 pm I checked out my Pinterest boards for a bit of inspiration searching the Challenge board and a general search for lobster buoys. What I realized is that it had always been about the colors and patterns found in lobster buoys when I’ve seen them hanging, whether in photos, painting or in walks along the waterfronts in Maine coastal towns. What they are hanging on is backdrop. Why had I chosen this buoy design from all I had sketched? I love colors and patterns and the buoys allowed me to do that. So solution – fill the mat with more buoys.
A quick grab of the mat and sketch in some buoys.  If you look close enough you can see the red shaker markings. A few black diagonal lines. But finally some extra buoys set under the already hooked ones to work as most of the background. I’d figure out how to complete the background once the buoys were all hooked.
Ok, I’m feeling better and not figuring I’ll have to start totally from scratch or hand over a mat I’m not proud to put my name with. But no more hooking tonight. I should be able to finish this off in a few hours tomorrow. Packed it all away.
Now it’s Friday morning and time to pull some more fun colors to get some buoys hooked. This took no time at all and no reverse hooking!
Once the buoys were all completed there was very little (what I was now thinking of as colorless) background. The way the buoys were hanging I decided to split the piece and have it appear they were hanging on a shed corner with sky. This worked up quick, especially where I went with a larger cut. Probably a #5, so still below my usual width of #8.

My lessons and hopefully encouragement for others is:
 Can now say I’m proud of my mat, but still not sure if I want to do the 3 others needed for a pillow. 🙂 Think I’d rather work on a new rug design.
I’m a self-taught rug hooker, no time yet for classes, rug camps, etc. Learning new or fine tuning my skills happens from workshops offered at our monthly meetings. Wish I had known if I would be at the May meeting. Instead of actually participating today, I observed and took notes that I’ll share here. Cindy Duade graciously agreed to let me take photos to share along with my notes.  It was a wonderful workshop with clear information, helpful tips and a teacher willing to help and allow time for members to work each step. Members were definitely busy hooking away. We seemed to have a much larger group still hooking after the noon pot luck than usual.
  (just one of 3 table areas)
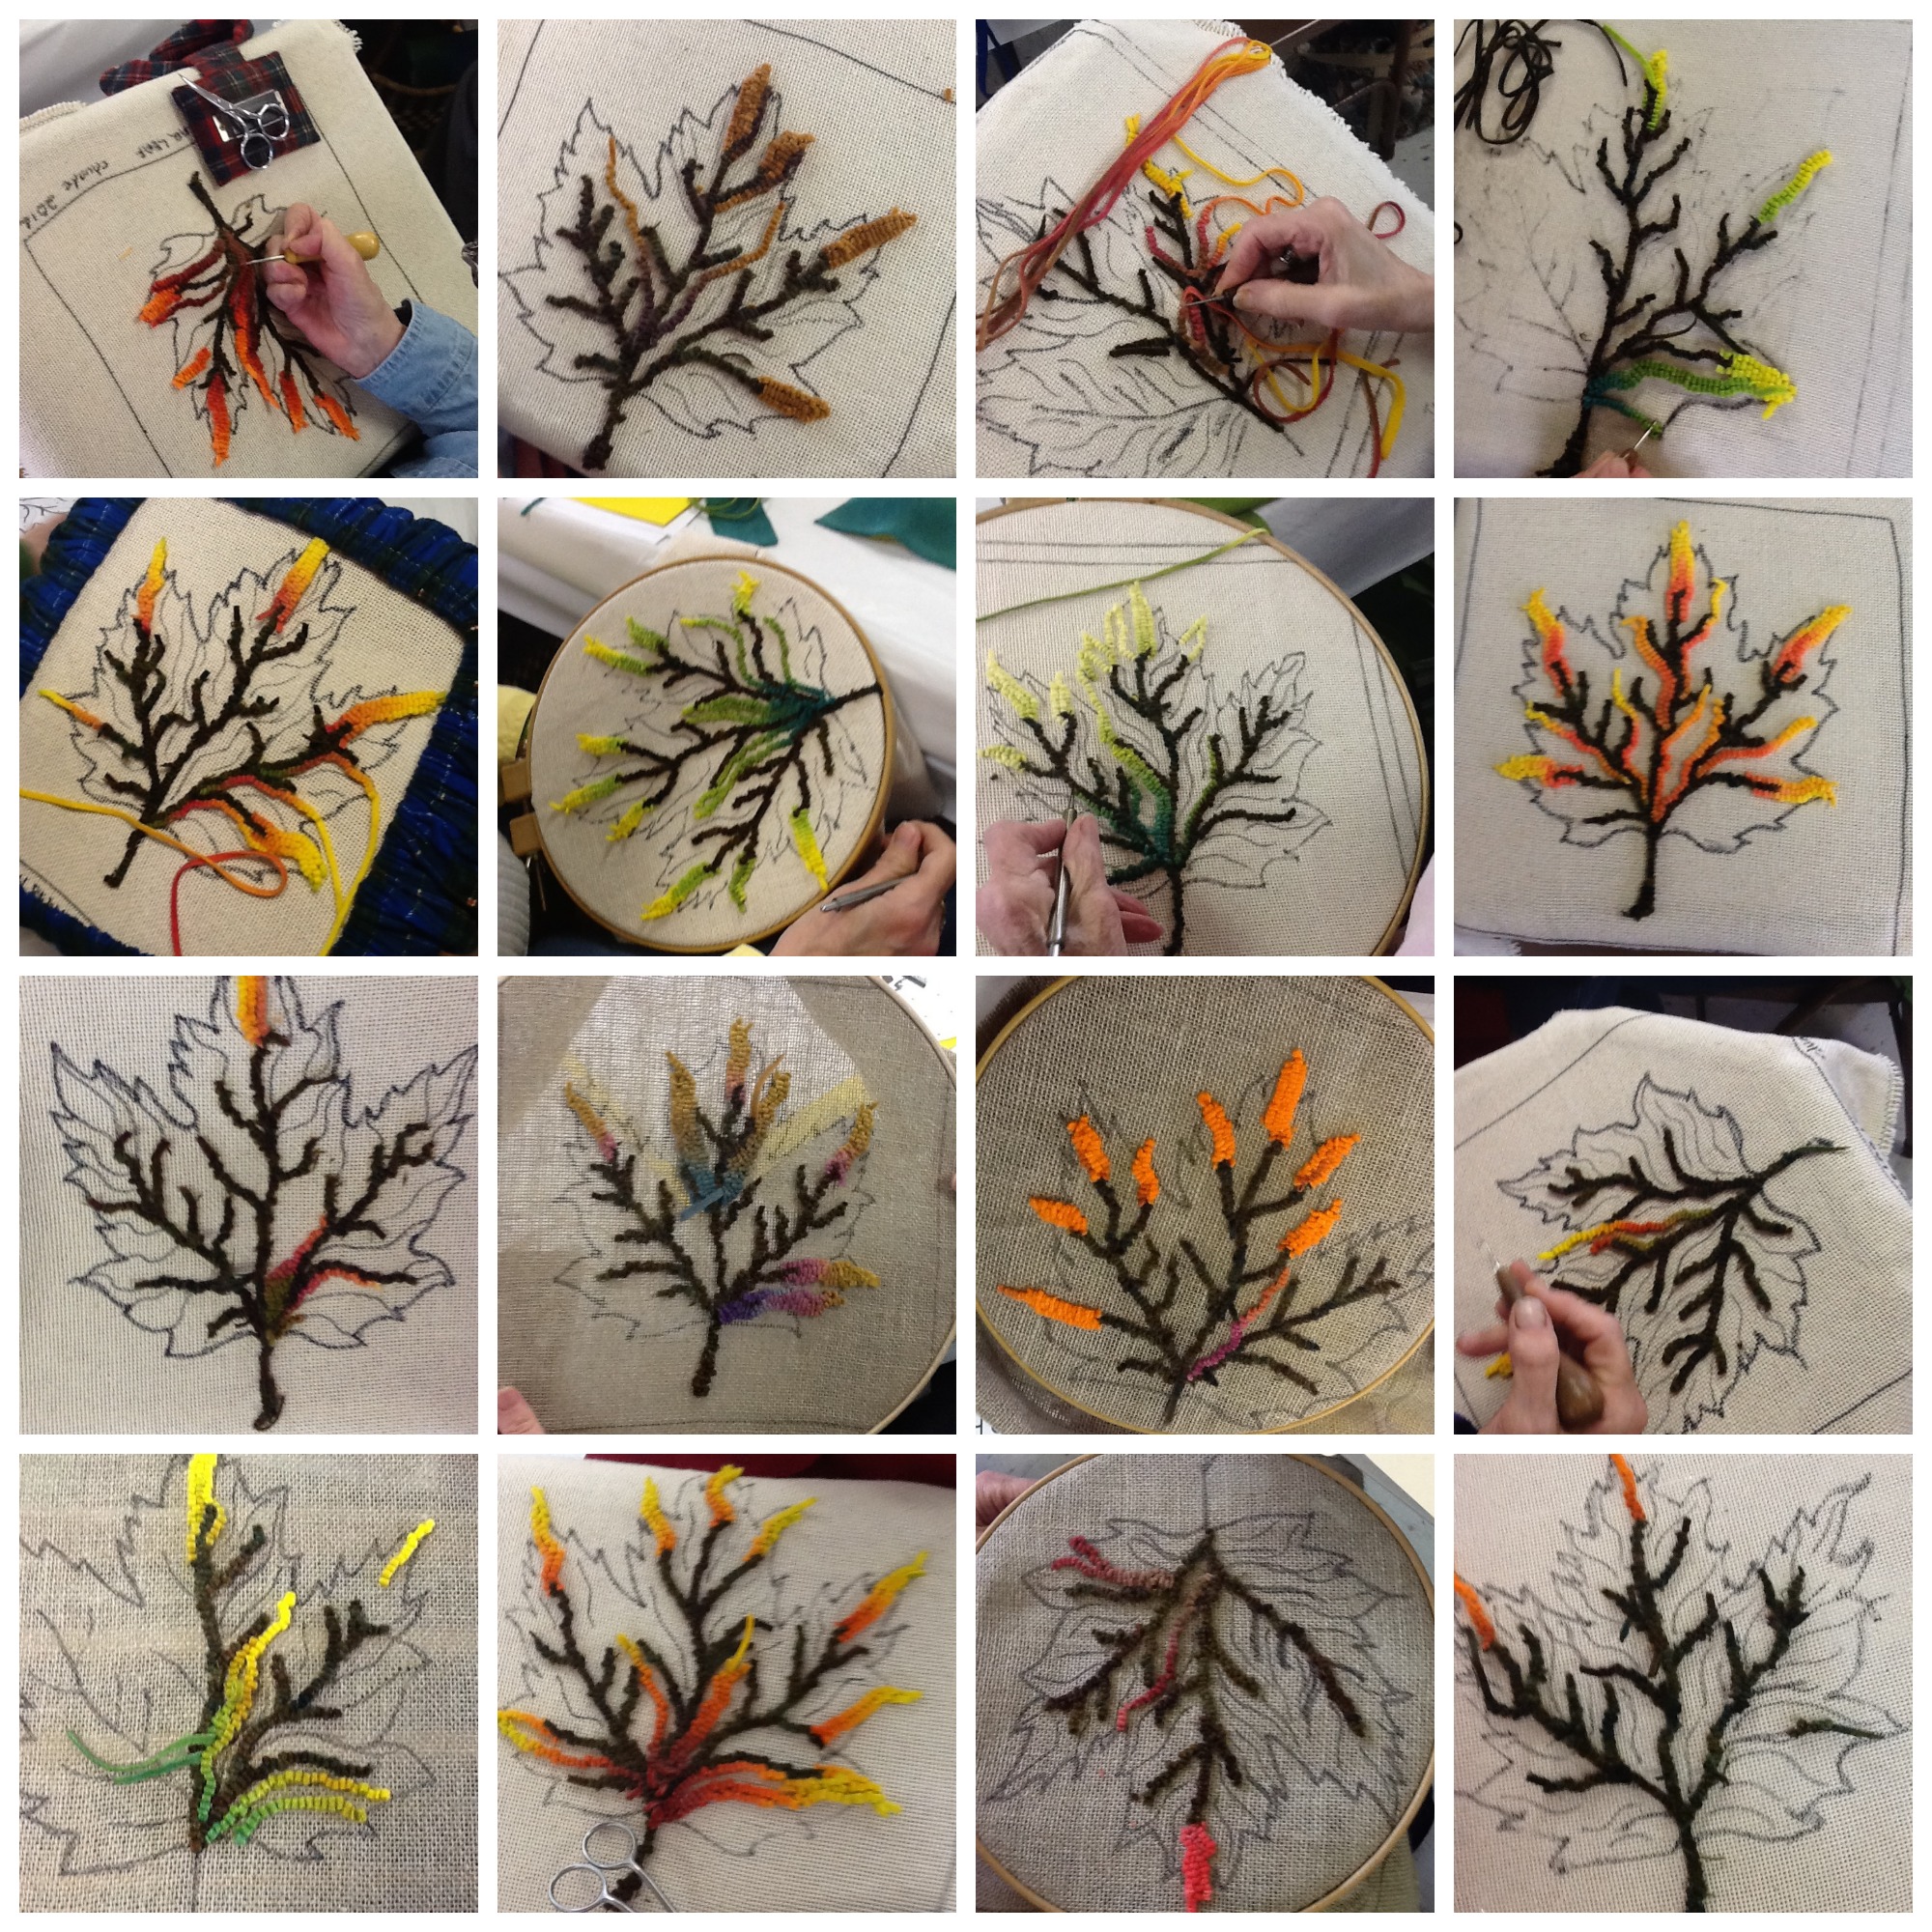
The collage above shows what leaves I was able to get photos of as the meeting drew to a close. Will be interesting to see how they all finish up. (Maybe an October Show and Share side bar VPs ?)
Now for my notes and take aways ~
Let’s start with a close up of the 4 hooked sample leaves Cindy had for display. These showed different ways to approach the light and dark of the leaf as well as different backgrounds.


 Using a real leaf, Cindy designed a special leaf pattern for use at this workshop. The pattern was copied onto foundation of choice. Red dot is great for that.
 These who participated in the workshop got an informational folder with such items as the pattern and photos showing progression/steps
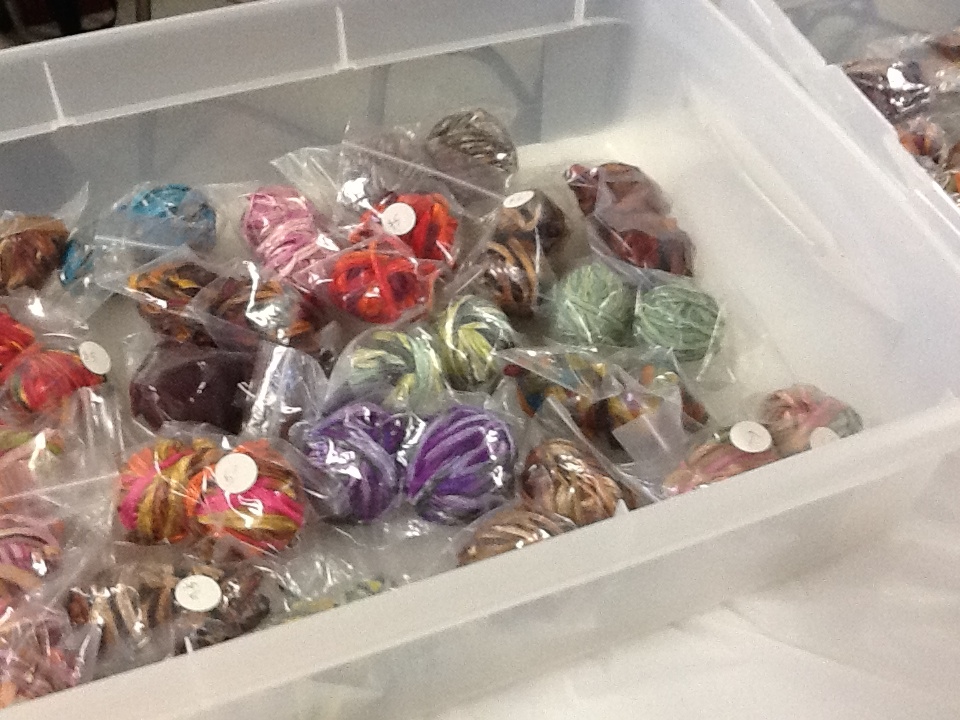
  and casserole dyed wool.
  It was fun to see what members chose for their pieces. Wool was cut #4
  , then carefully placed in order. Tip: use folder with masking tape to maintain the cutting order.
 Tape over ends or loop the tape so a sticky side is up to just lay cut strips on.
  One side can be used to organize the cut off pieces.
Work with up to 6 colors on one piece of dyed wool (light to dark). Colors may seem too bright, but they settle in together once hooked. For background just about any wool works, whether textured, as is wool, spot dyed or solid.
NO Straight Lines! Remember a natural leaf has curves, not straight lines.
Veins are hooked in first. Leaf is not outlined.
Leaf points either all start light or dark. Once decide then you are ready to start.
Hook from leaf edge to veins. Cut off unused section of strip and set aside. Once have these main points hooked in, time to start work on center. First draw in additional curve lines into design for guidance. Start at base (vein) with opposite color end than points (dark here since points light) and hook the strip out.
  (Can see the dark blue in the center along vein. Hooked all the way to a minor point.)
 (Can see different positioning again off the center vein.) This also leads to minor points being hooked more with the colors found in the middle of the strip.
With hooking all these first strips remember to never use one you have cut off. Always work with a new strip.
After get some dark runs you start to fill in. To match up the shading/color you can do by pulling the tail out until reach the color you want and start hooking, or you can pull a loop until reach color, start to hook then cut at the starting loop. (I would do pull the tail as you can see with the green strip here.)  (I would also be checking those cut off sections to match up colors, as I’m a use every piece type of rug hooker.)
Do Not end each strip on the leaf edge. It is not a look you want. On some turn and hook a bit back along side.
To finish Cindy recommends using ribbon.  Tip: to sample the look the ribbon will give once whipped, wrap some around a pencil and check against your background fabric.
You whip through the foundation and the attached finish backing material. Lay pencil along edge of finished hooking to get a nice even, but small edge. Mark and trim. Tip: for attaching backing fabric which often moves around as you whip: Use spray adhesive like that used by quilters. This is temporary adhesive. Also pin edge.
Finished edge. 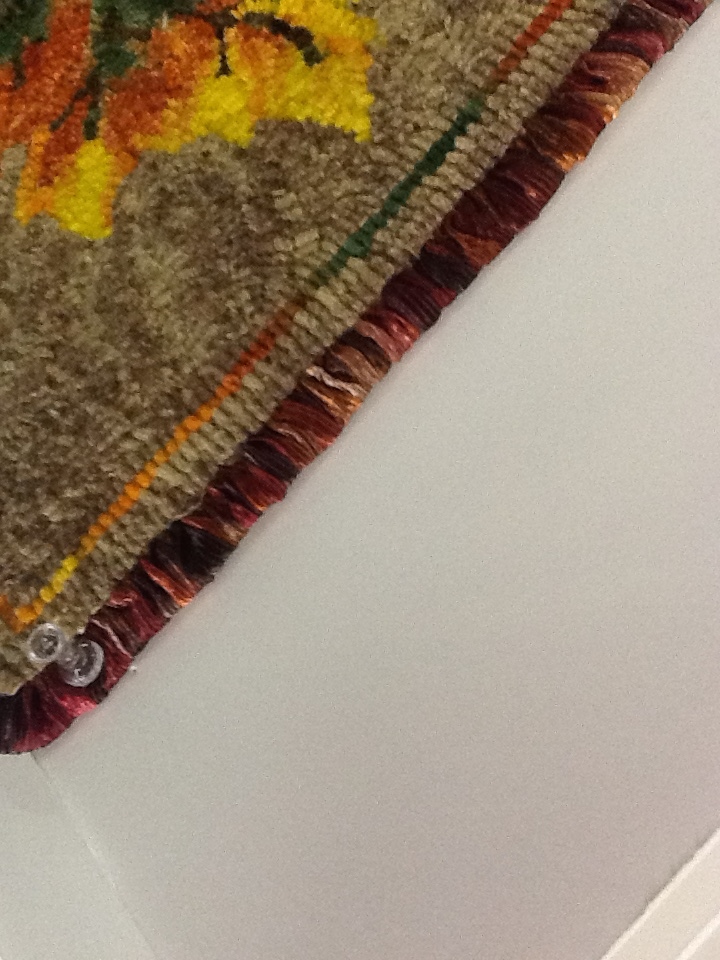
The Tin Pedlars just held a wonderful exhibit in a pretty unique location at Bowdoin College, Brunswick, ME. The exhibit had wonderful reviews from students, visitors and group members that were able to attend the reception and/or the exhibit on their own.
For those that were not able to attend I thought it might be fun to be able to take a video tour, so iPad in hand I toured the exhibit. (Now a word of warning I am no video specialist. I did my best to keep steady and get some closer shots for detail.)
The first video starts at what I figure is the natural beginning. Rugs were hung in grouping to best show themes and techniques. After the hallway I will enter the plexiglass room.
IMG 1366 from Country Fun Child Care on Vimeo.
This second (short) video will start with a reshowing of a few rugs hoping for better clarity, then continuing through the plexiglass room.
IMG 1367 from Country Fun Child Care on Vimeo.
This next video is of the upper hallway.
IMG 1368 from Country Fun Child Care on Vimeo.
The last video is of what the committee referred to as the Jackye Hansen room. Here were exhibited pieces designed and hooked by Jackye and some of her students, especially around the traditional art of Waldoboro rug hooking.
IMG 1369 from Country Fun Child Care on Vimeo.
I hope you enjoyed the tour and have received a bit of inspiration.
Hooked Rug Museum of North America is pleased to announce this year’s honorees for the “Rug Hooking Artist of the Year” for Canada and the United States. 
This is the second year such an appointment is being made. The winners are chosen because of their special attributes and their contribution to the contemporary advancement of the art of rug hooking and its gradual transformation over three centuries of development in North America. Such provides us with an annual assessment of rug hooking in comparison to an early stage of hooking and offers an opportunity to learn more about the amazing talents that exist in the art.
Thanks to both artists for their generosity in sharing their art with us for the 2014 summer season.
Our Canadian “Rug Hooking Artist of the Year” is Trish Johnson from Toronto, Ontario. Trish has been hooking since 1988. She was self-taught for the first four rugs and then joined the Georgetown rug hooking group. She has taken many hooking workshops and belongs to the teacher’s branch of the Ontario Hooking Craft Guild, the Georgetown Rug Hooking Guild and the Upper Toronto Hooking Guild.
Trish hooks rugs about places that are important to her family history, trying to answer questions about what “home” means to her. Home is where the heart is and all of her rugs are about those things and events that are dear to her heart. She designs her own patterns, mostly from her own photographs; dyes most of her own wool (especially the skies) and likes to use some recycled wool from Goodwill. Trish has been featured in Rug Hooking magazine’s “A Celebration of Hand Hooked Rugs”.
Our American “Rug Hooking Artist of the Year” is Sibyl Osicka from Parma, Ohio. Sibyl’s introduction to rug hooking began in 1982 because she wanted to make a Victorian style rug for her living room. By 1985, she was sponsored for the Pearl McGown Teacher’s Workshop. Sibyl became accredited in 1989, and was asked to teach two different workshops that
year and has been teaching since. She has traveled throughout the USA and Canada teaching and displaying her work. She continues to study and expand her knowledge in all aspects of the art.
She currently is a member of the Pearl McGown guild, Emerald#5; ATHA; and Tighr; and completed her second accreditation in 2003 as a McGown instructor. Sibyl also mentors students and teachers, and has taught classes over the internet. For more information on Sibyl please visit her website: http://www.sibylosicka.com/
It’s never good when you look forward to an activity you need to travel to and are greeted by a driveway of ice and nasty rain. That’s what happened for many of our members on Jan. 11th. For those that could travel through the resulting messy roads they enjoyed a look into the life of Ellen Sullivan through her primitive rugs and the genuine personal stories told by artist John Neville. 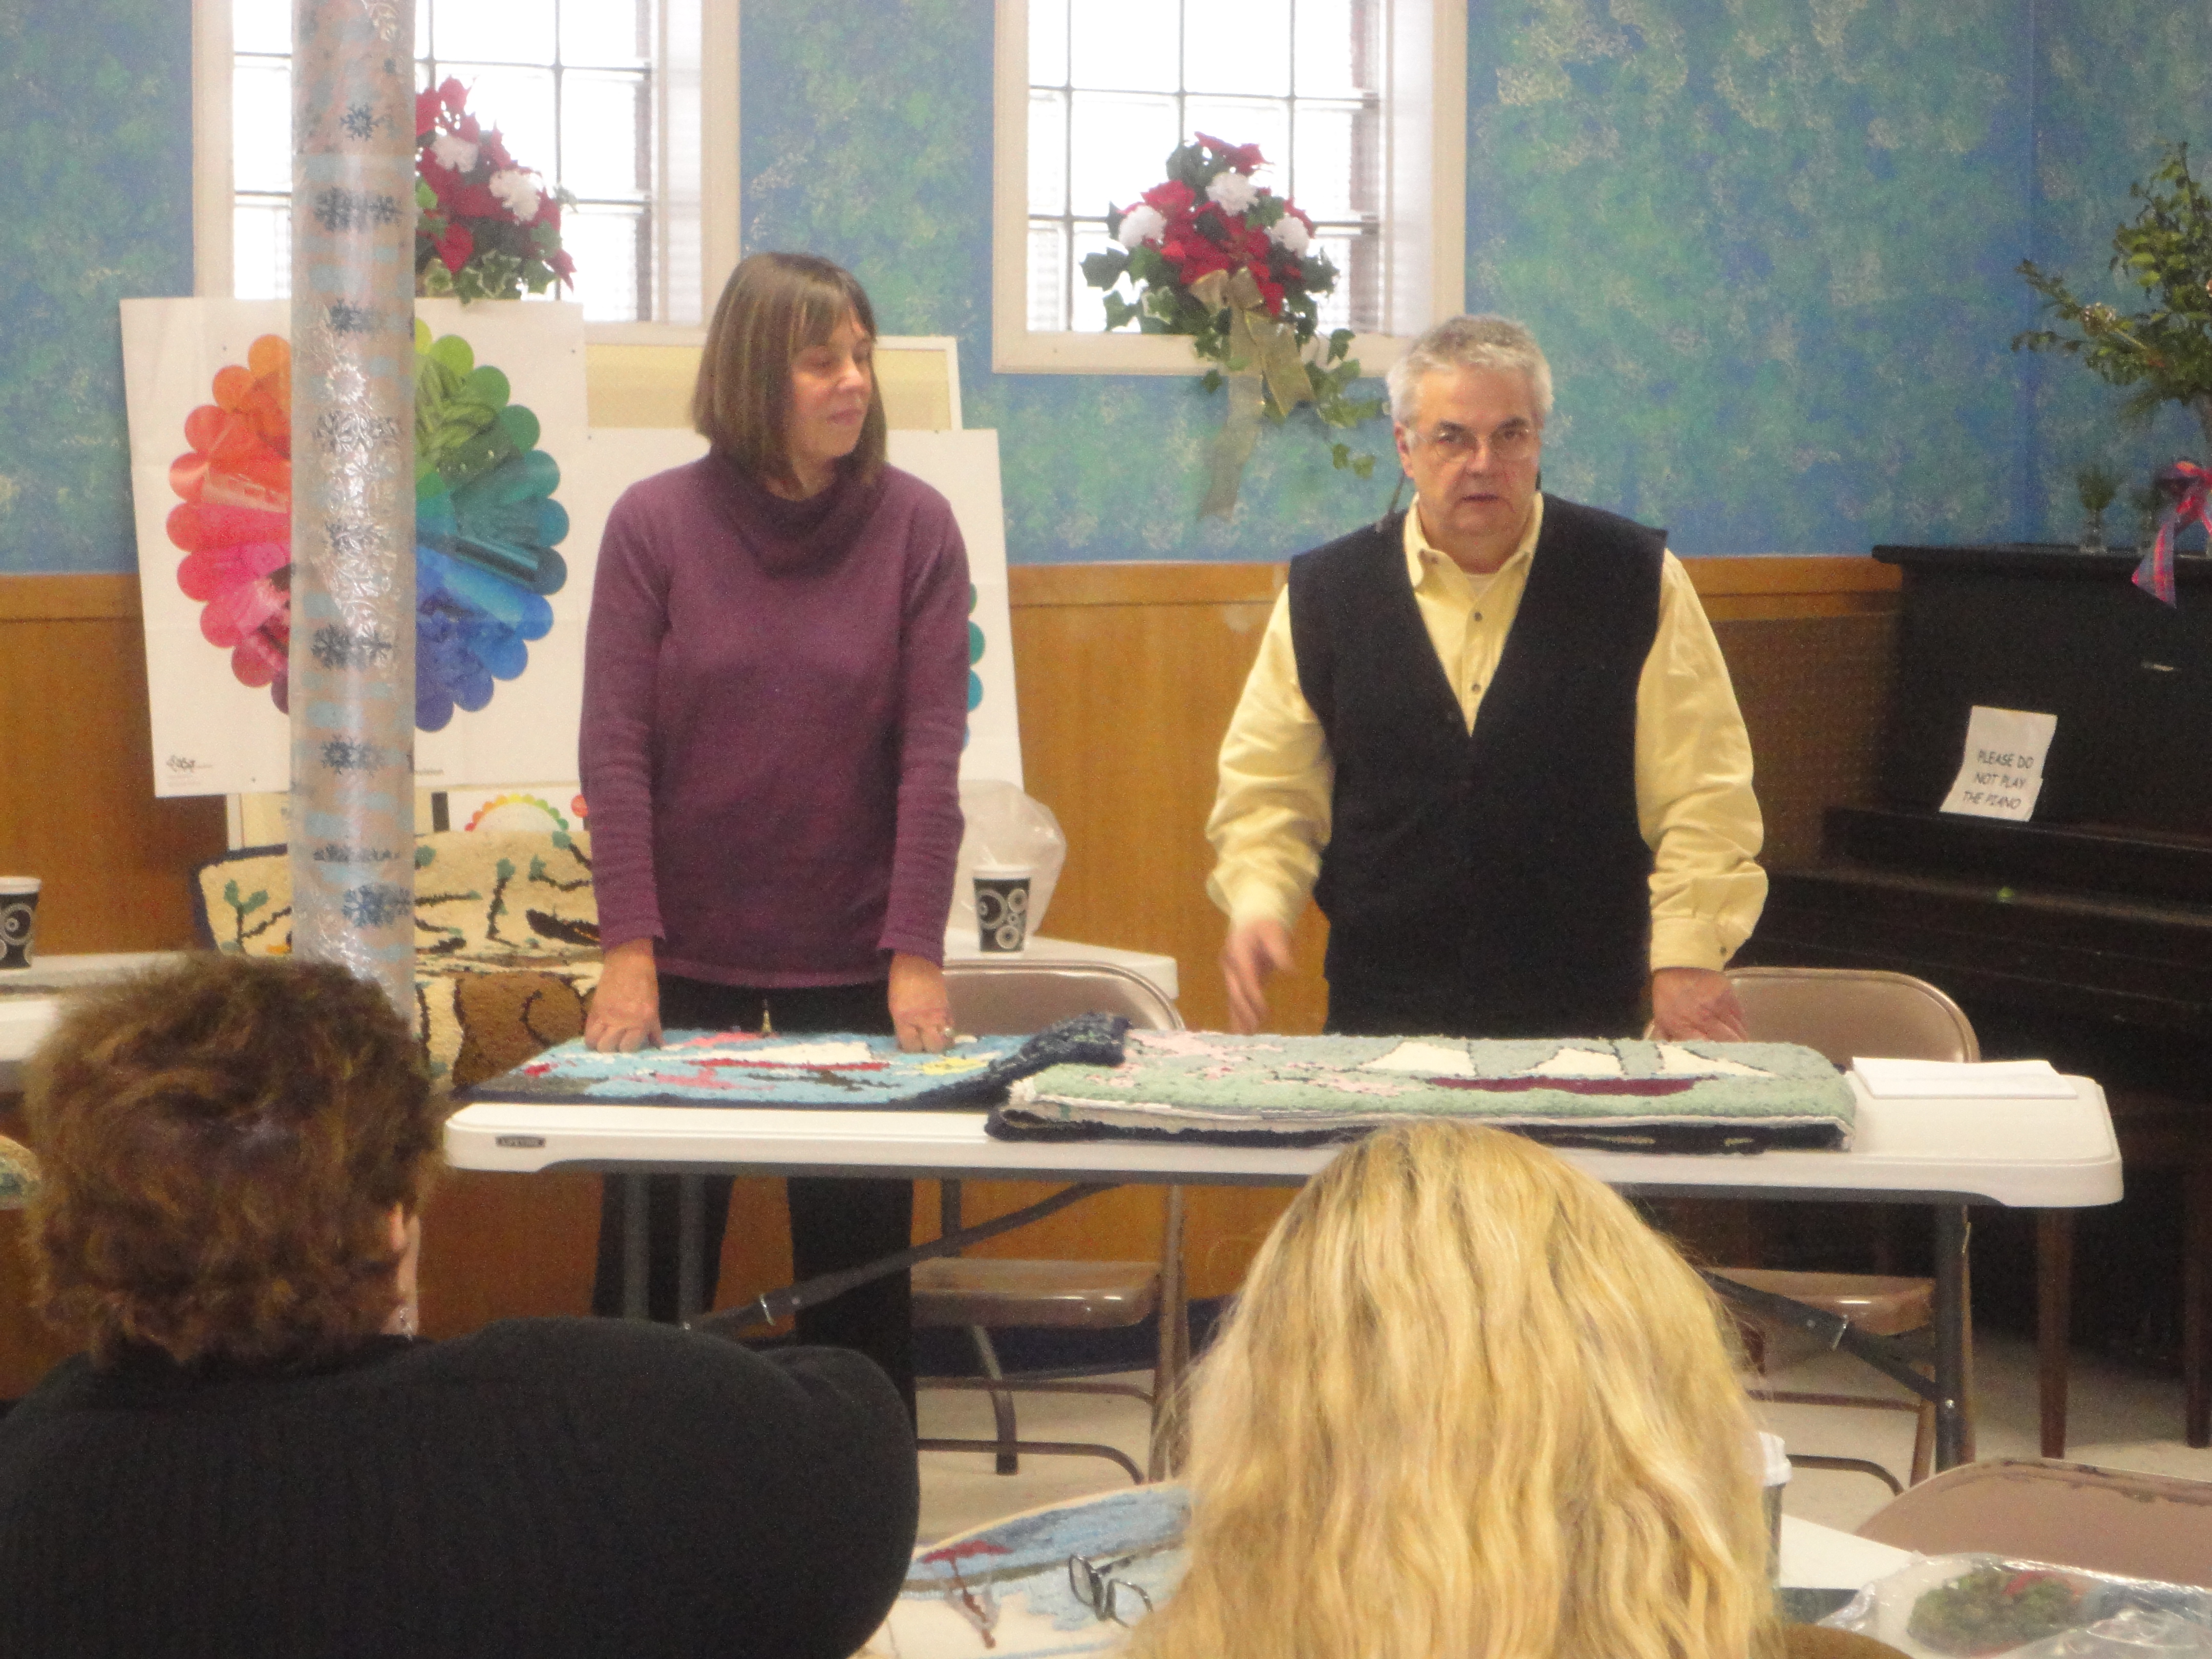 Elaine Eskesen accompanied John to share how Ellen’s work has inspired her journey into rug hooking.
~~ ~~ ~~ ~~ ~~
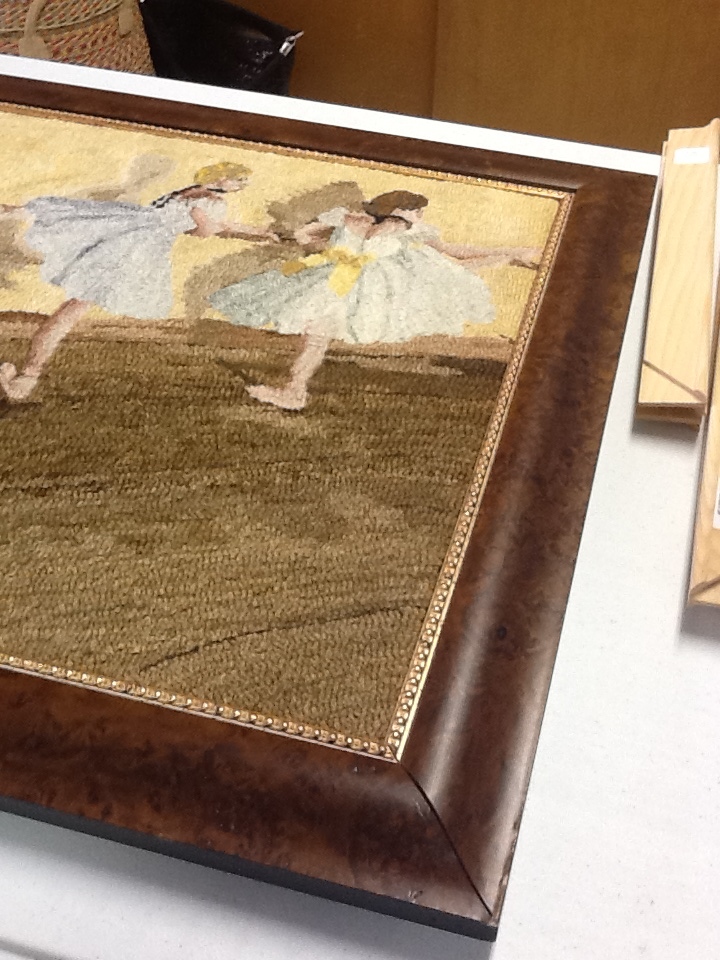
First, presenters usually bring their work to share, but it’s been awhile since I’ve walked into a meeting and seen so many tables covered with the rugs of one artist. (just a sample)


On closer inspection the wonder increased. Most of the works were not hooked in wool (yarn included). 
The binding was misc. pieces of fabric hand stitched in place. 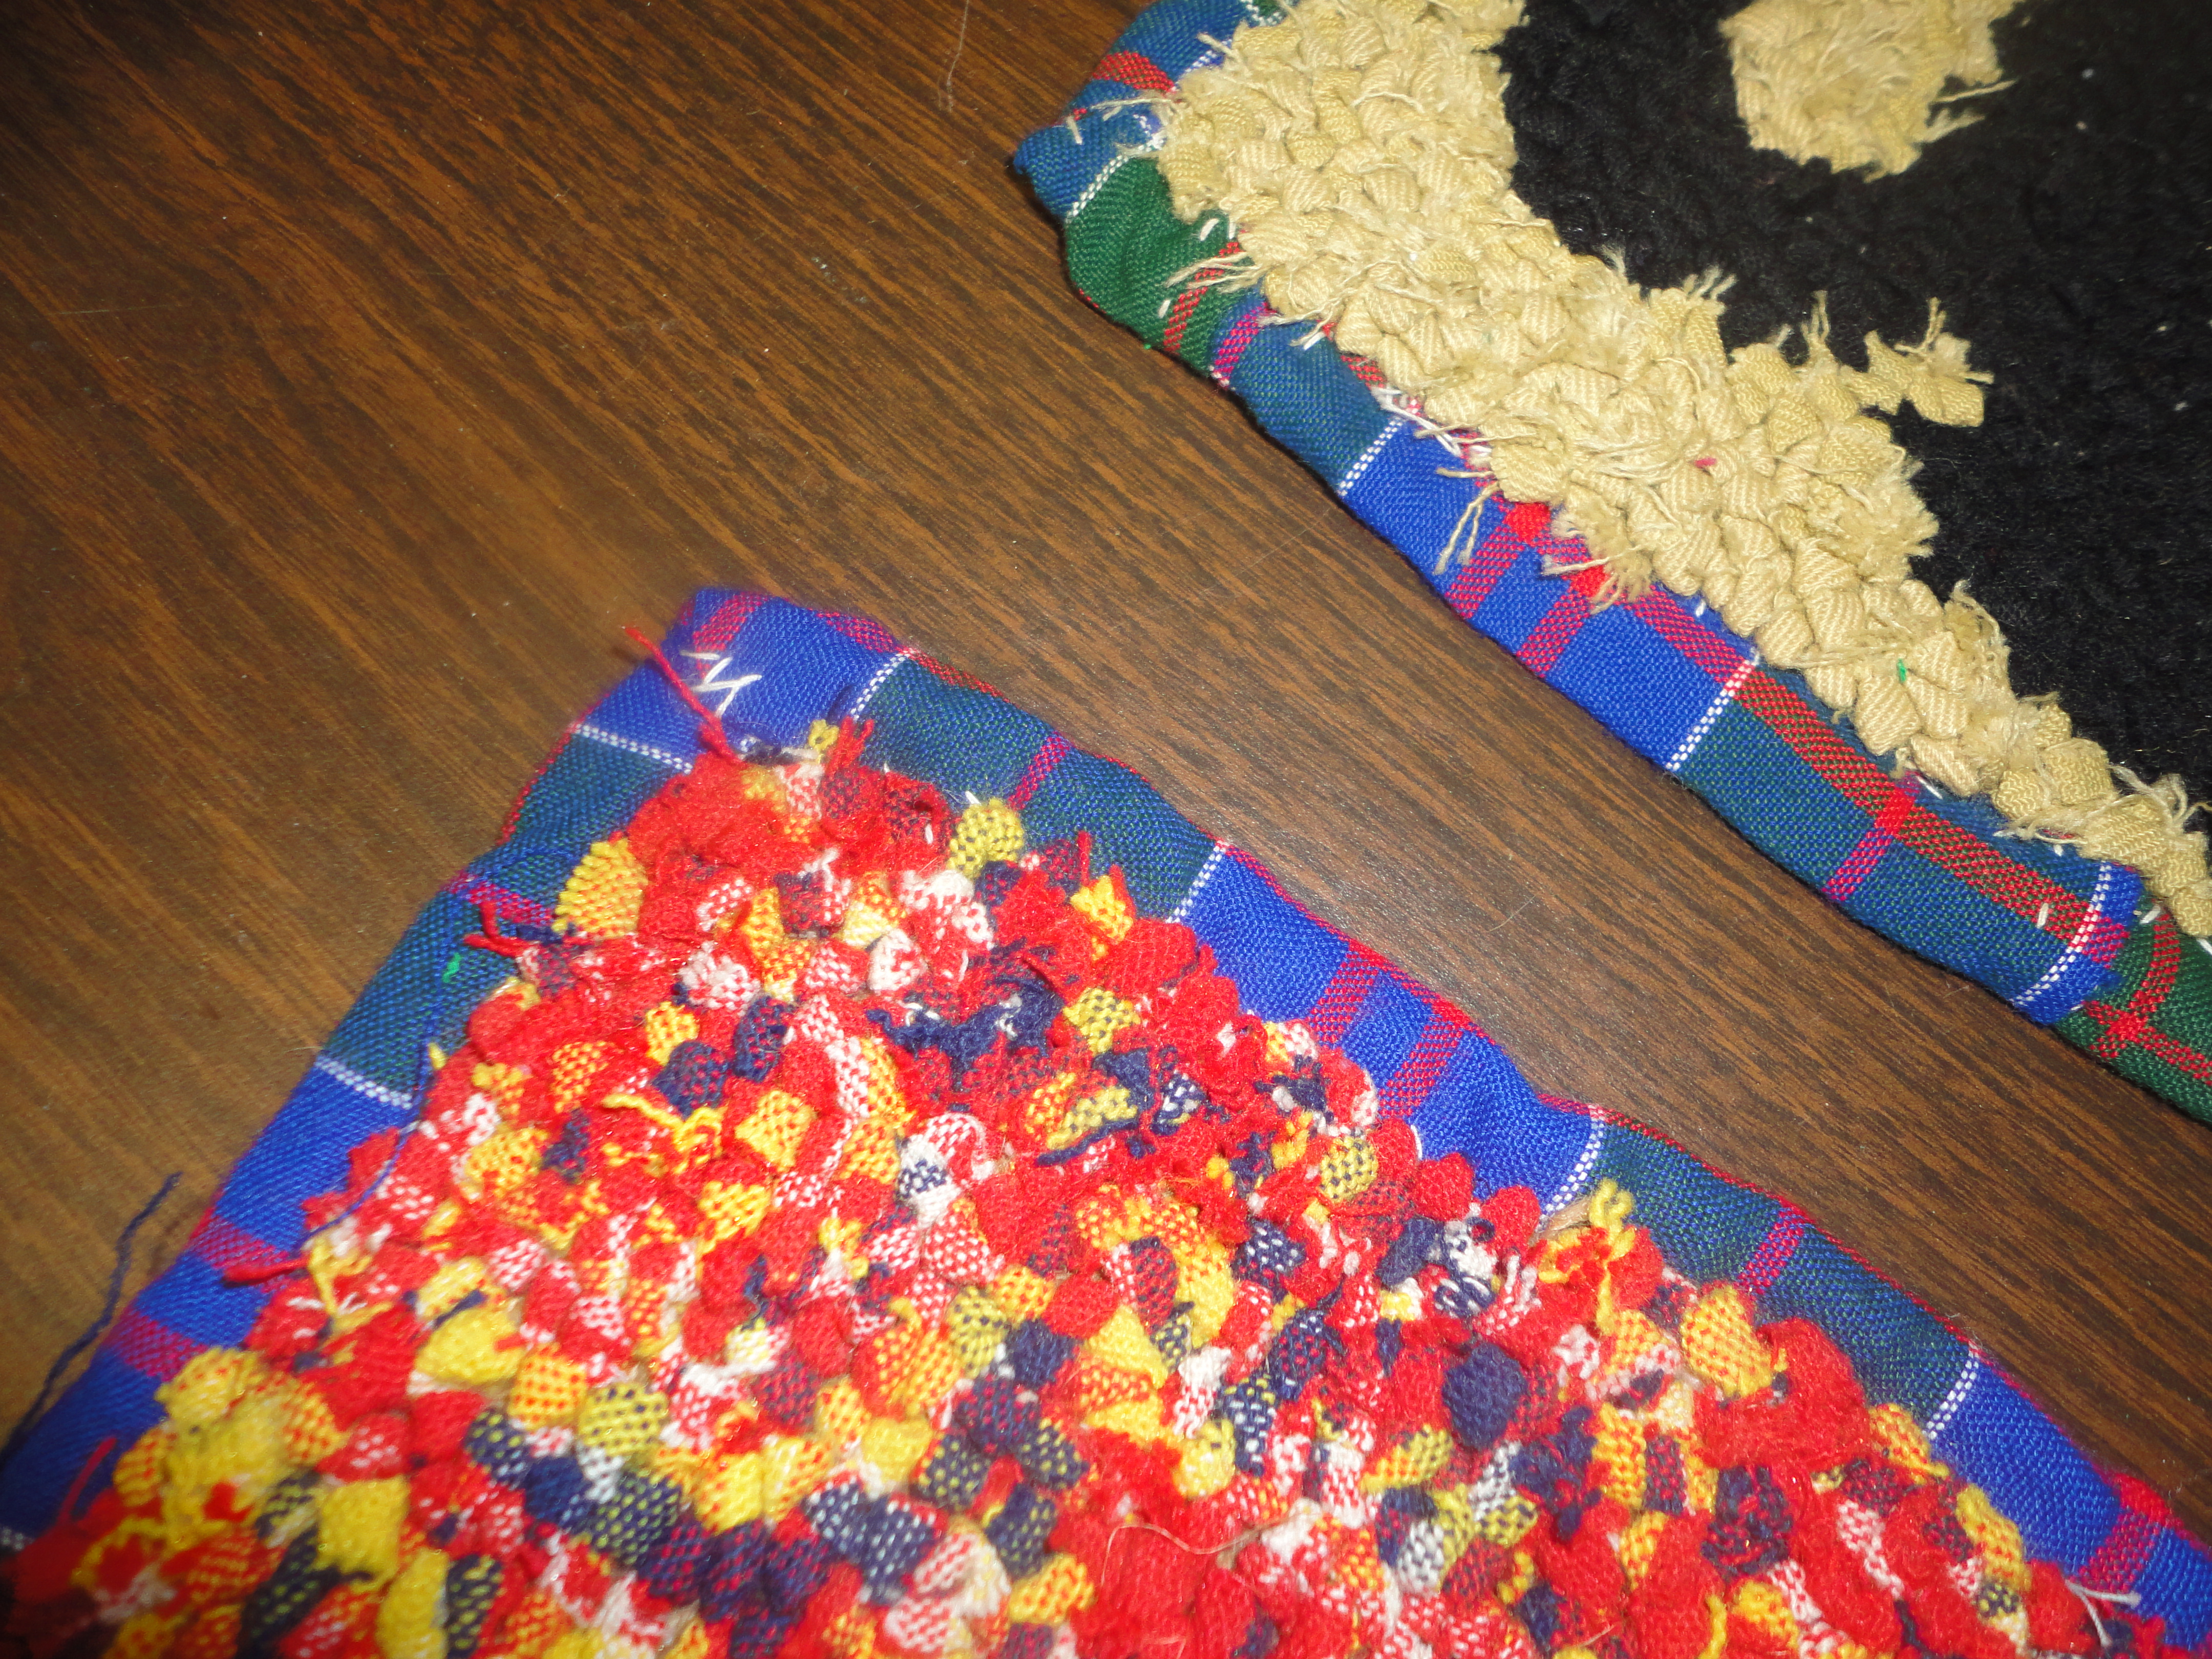 Foundation also seemed to be mostly burlap, but a woven red looked like it might be red long johns. John said “Ellen had tried linen, but preferred burlap for hooking on”.
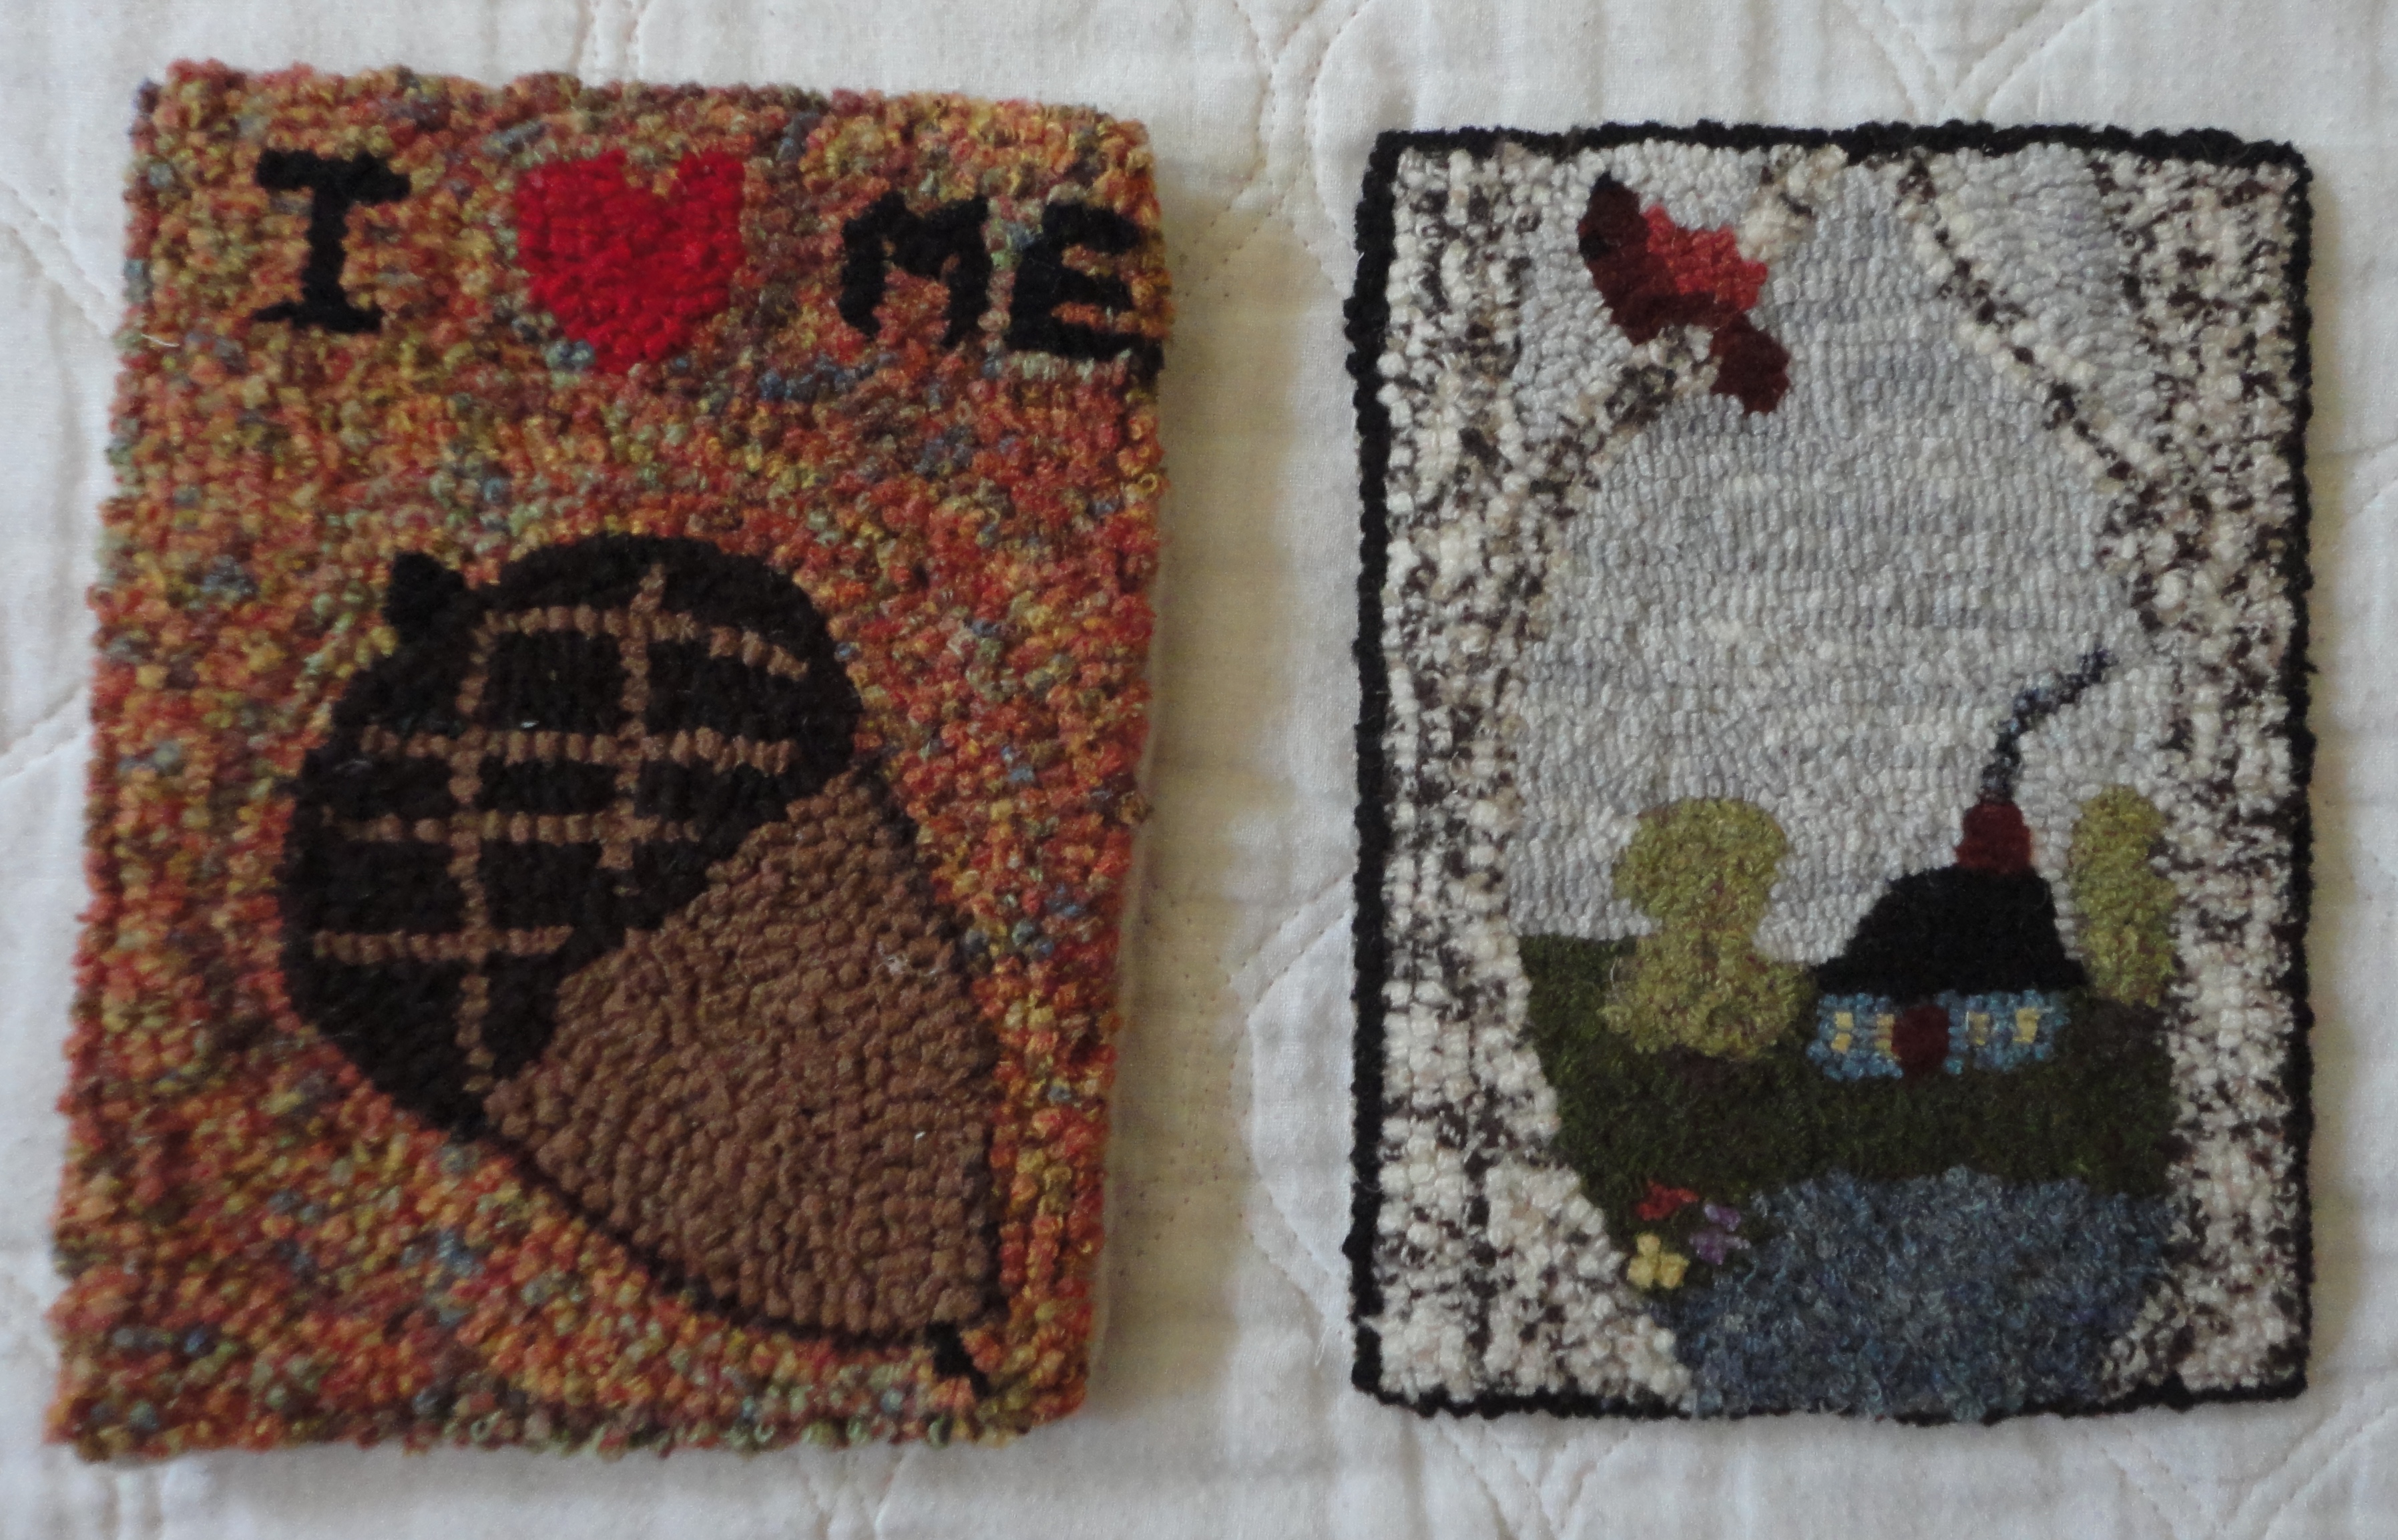
Then you got beyond the fabric to really looking at the designs. Ellen Sullivan drew what she had to have been seeing in her daily life. Would one say she had a talent for drawing, not necessarily, but she definitely fits into a great folk artist.
Next comes the colors. Looking forward to hearing about the why they are what they are. Being one who hooks primarily with recycled wool think I have an idea about this.
~~ ~~ ~~ ~~ ~~
Born in 1907, Ellen spent most of her life in the Black Rock, Halls Harbour area of Nova Scotia. Growing up in a remote area without close neighbors or electricity her rugs depict images from her daily life. Ellen learned hooking from her mother and maintained at least one lesson from her throughout her years of hooking. “Using green for the eyes will make them stand out.”
Ellen’s rugs were made for a utilitarian reason. They were drawn free hand with carpenter’s chalk directly onto the foundation. They were hooked from whatever material was on hand and much of it was material passed along by neighbors/friends within the community. As John told it, “Ellen would cut apart the clothing, laying it out, cutting and tearing it into strips.” This use of repurposed fabric explains the colors for many of the pieces – she used what she had available, no dyed wools. Looking at the backgrounds you could see how she hooked/worked until a material ran out and then started another. 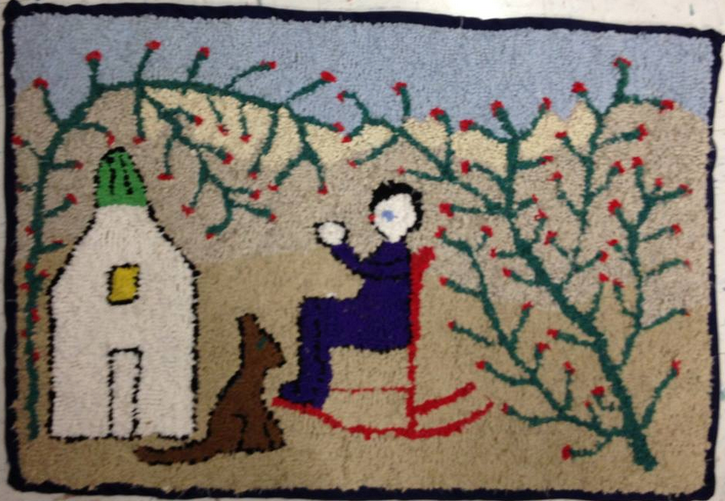
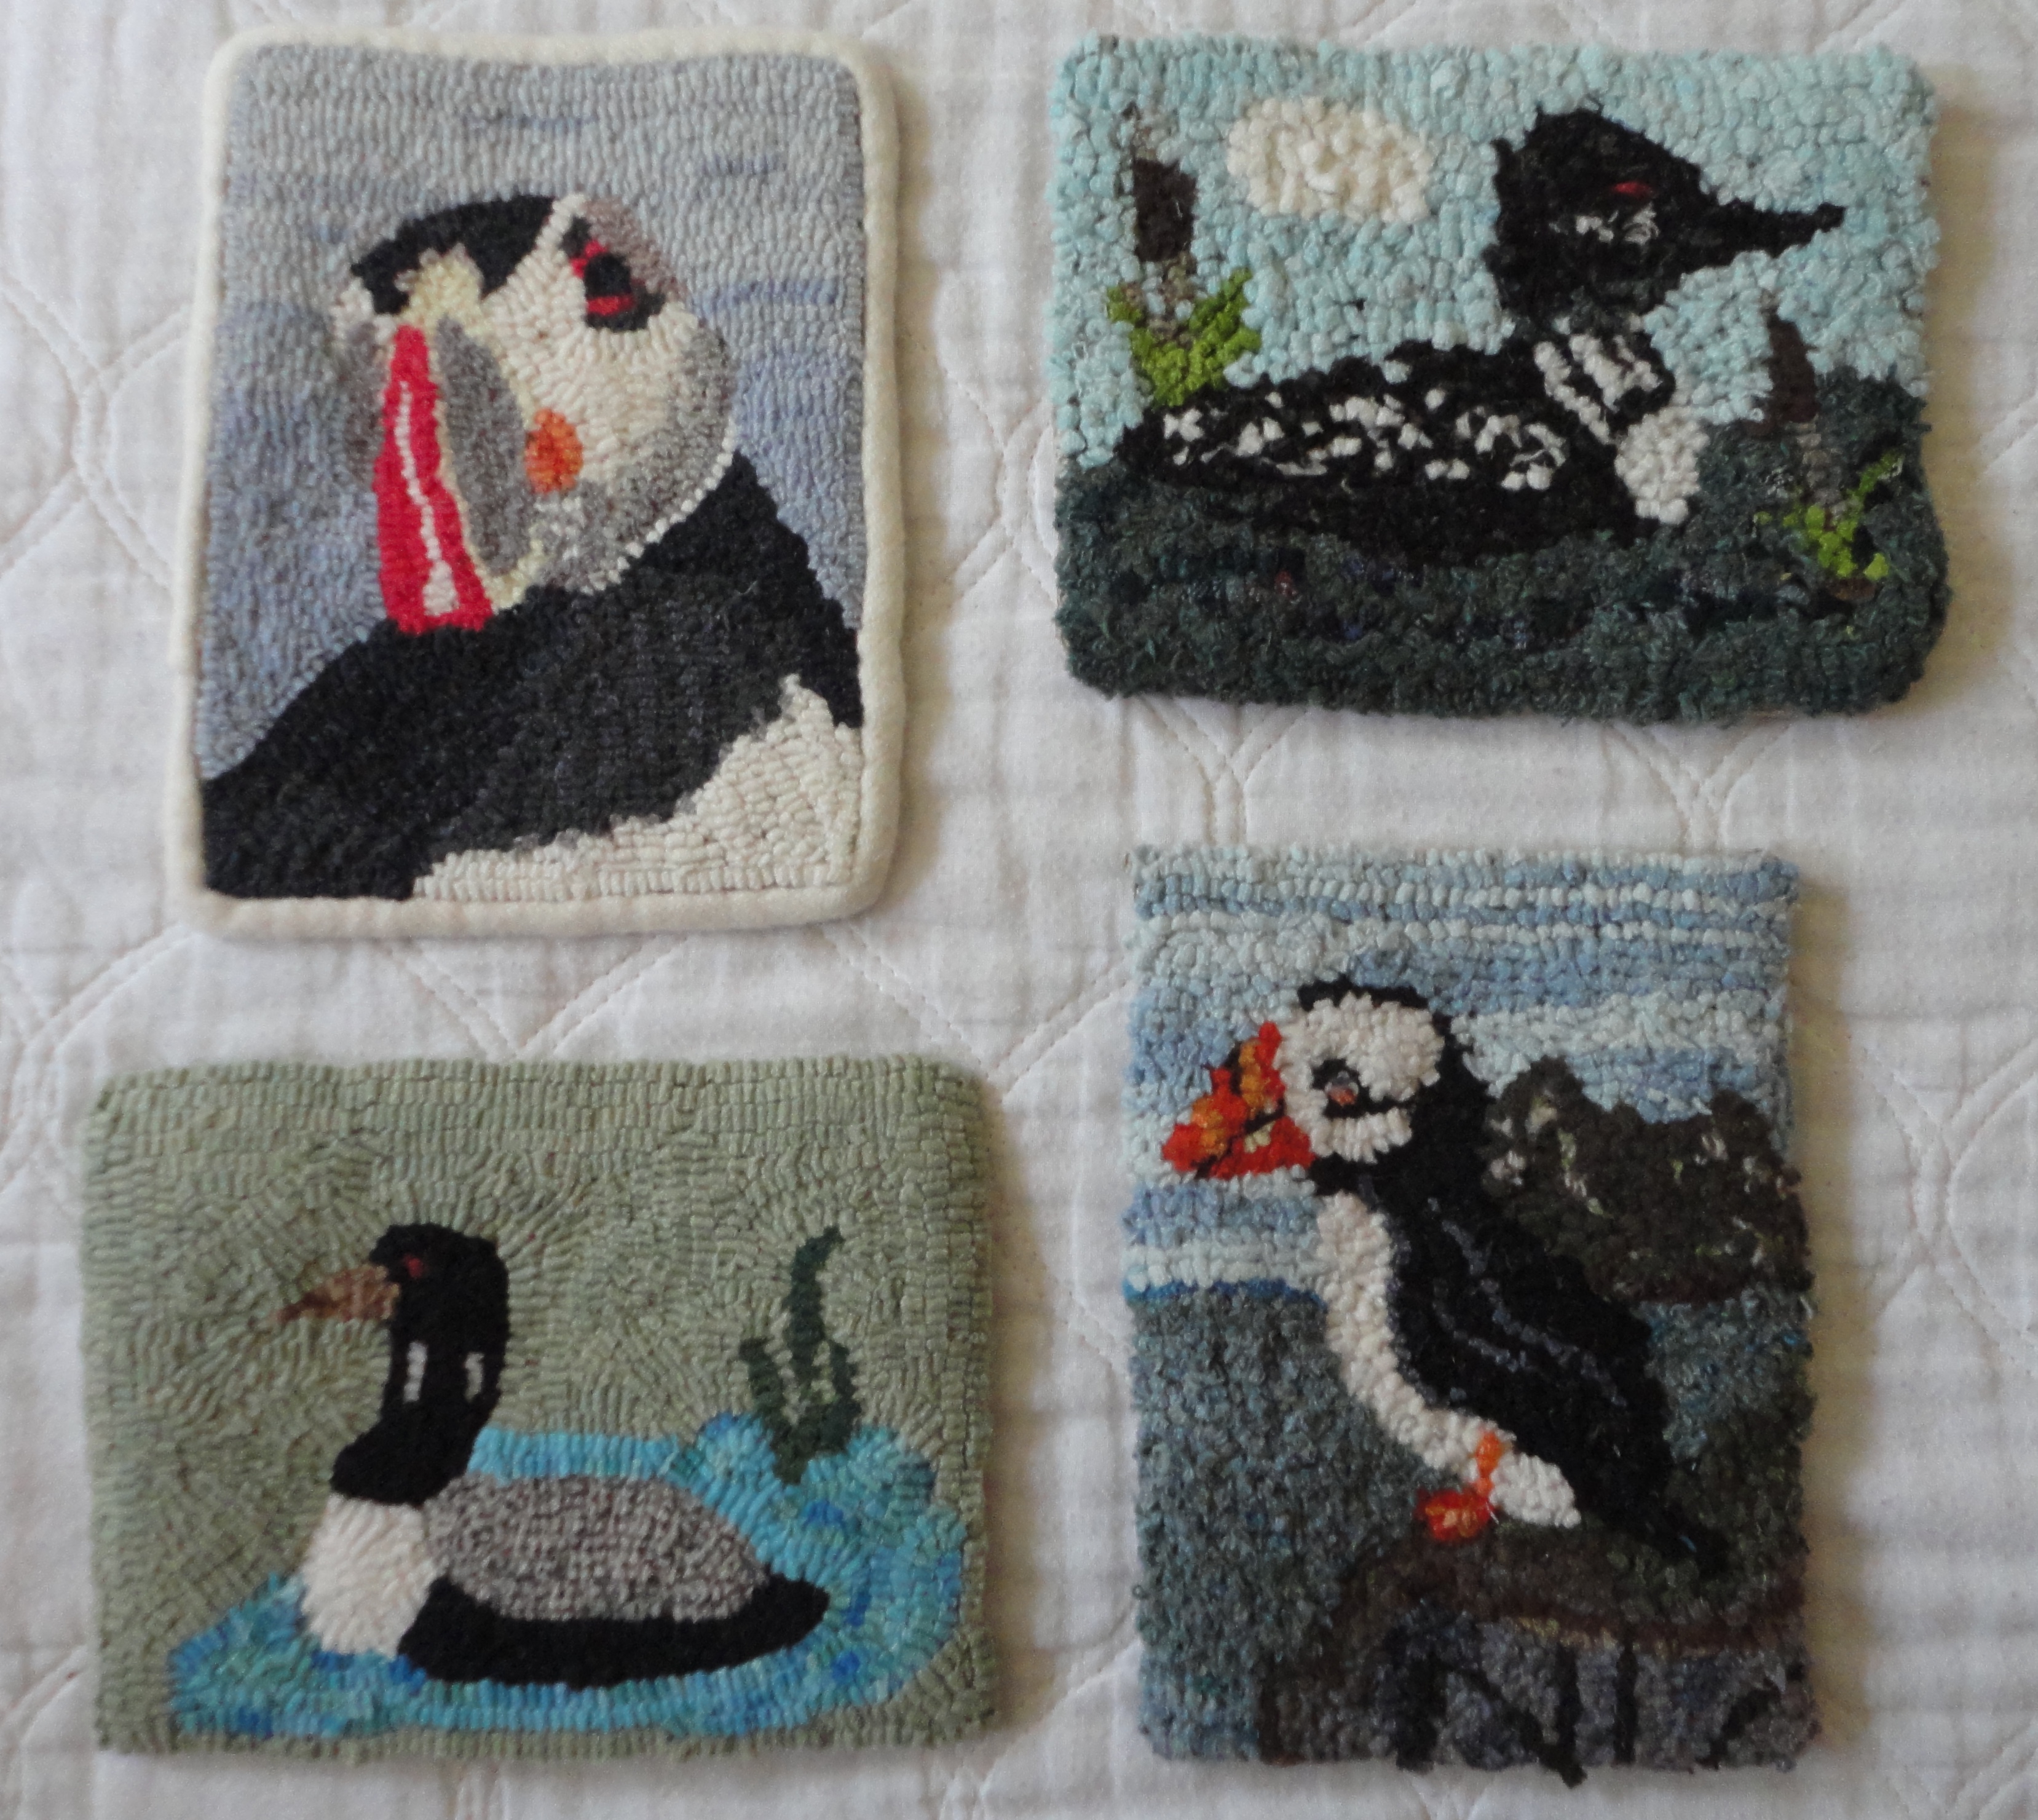
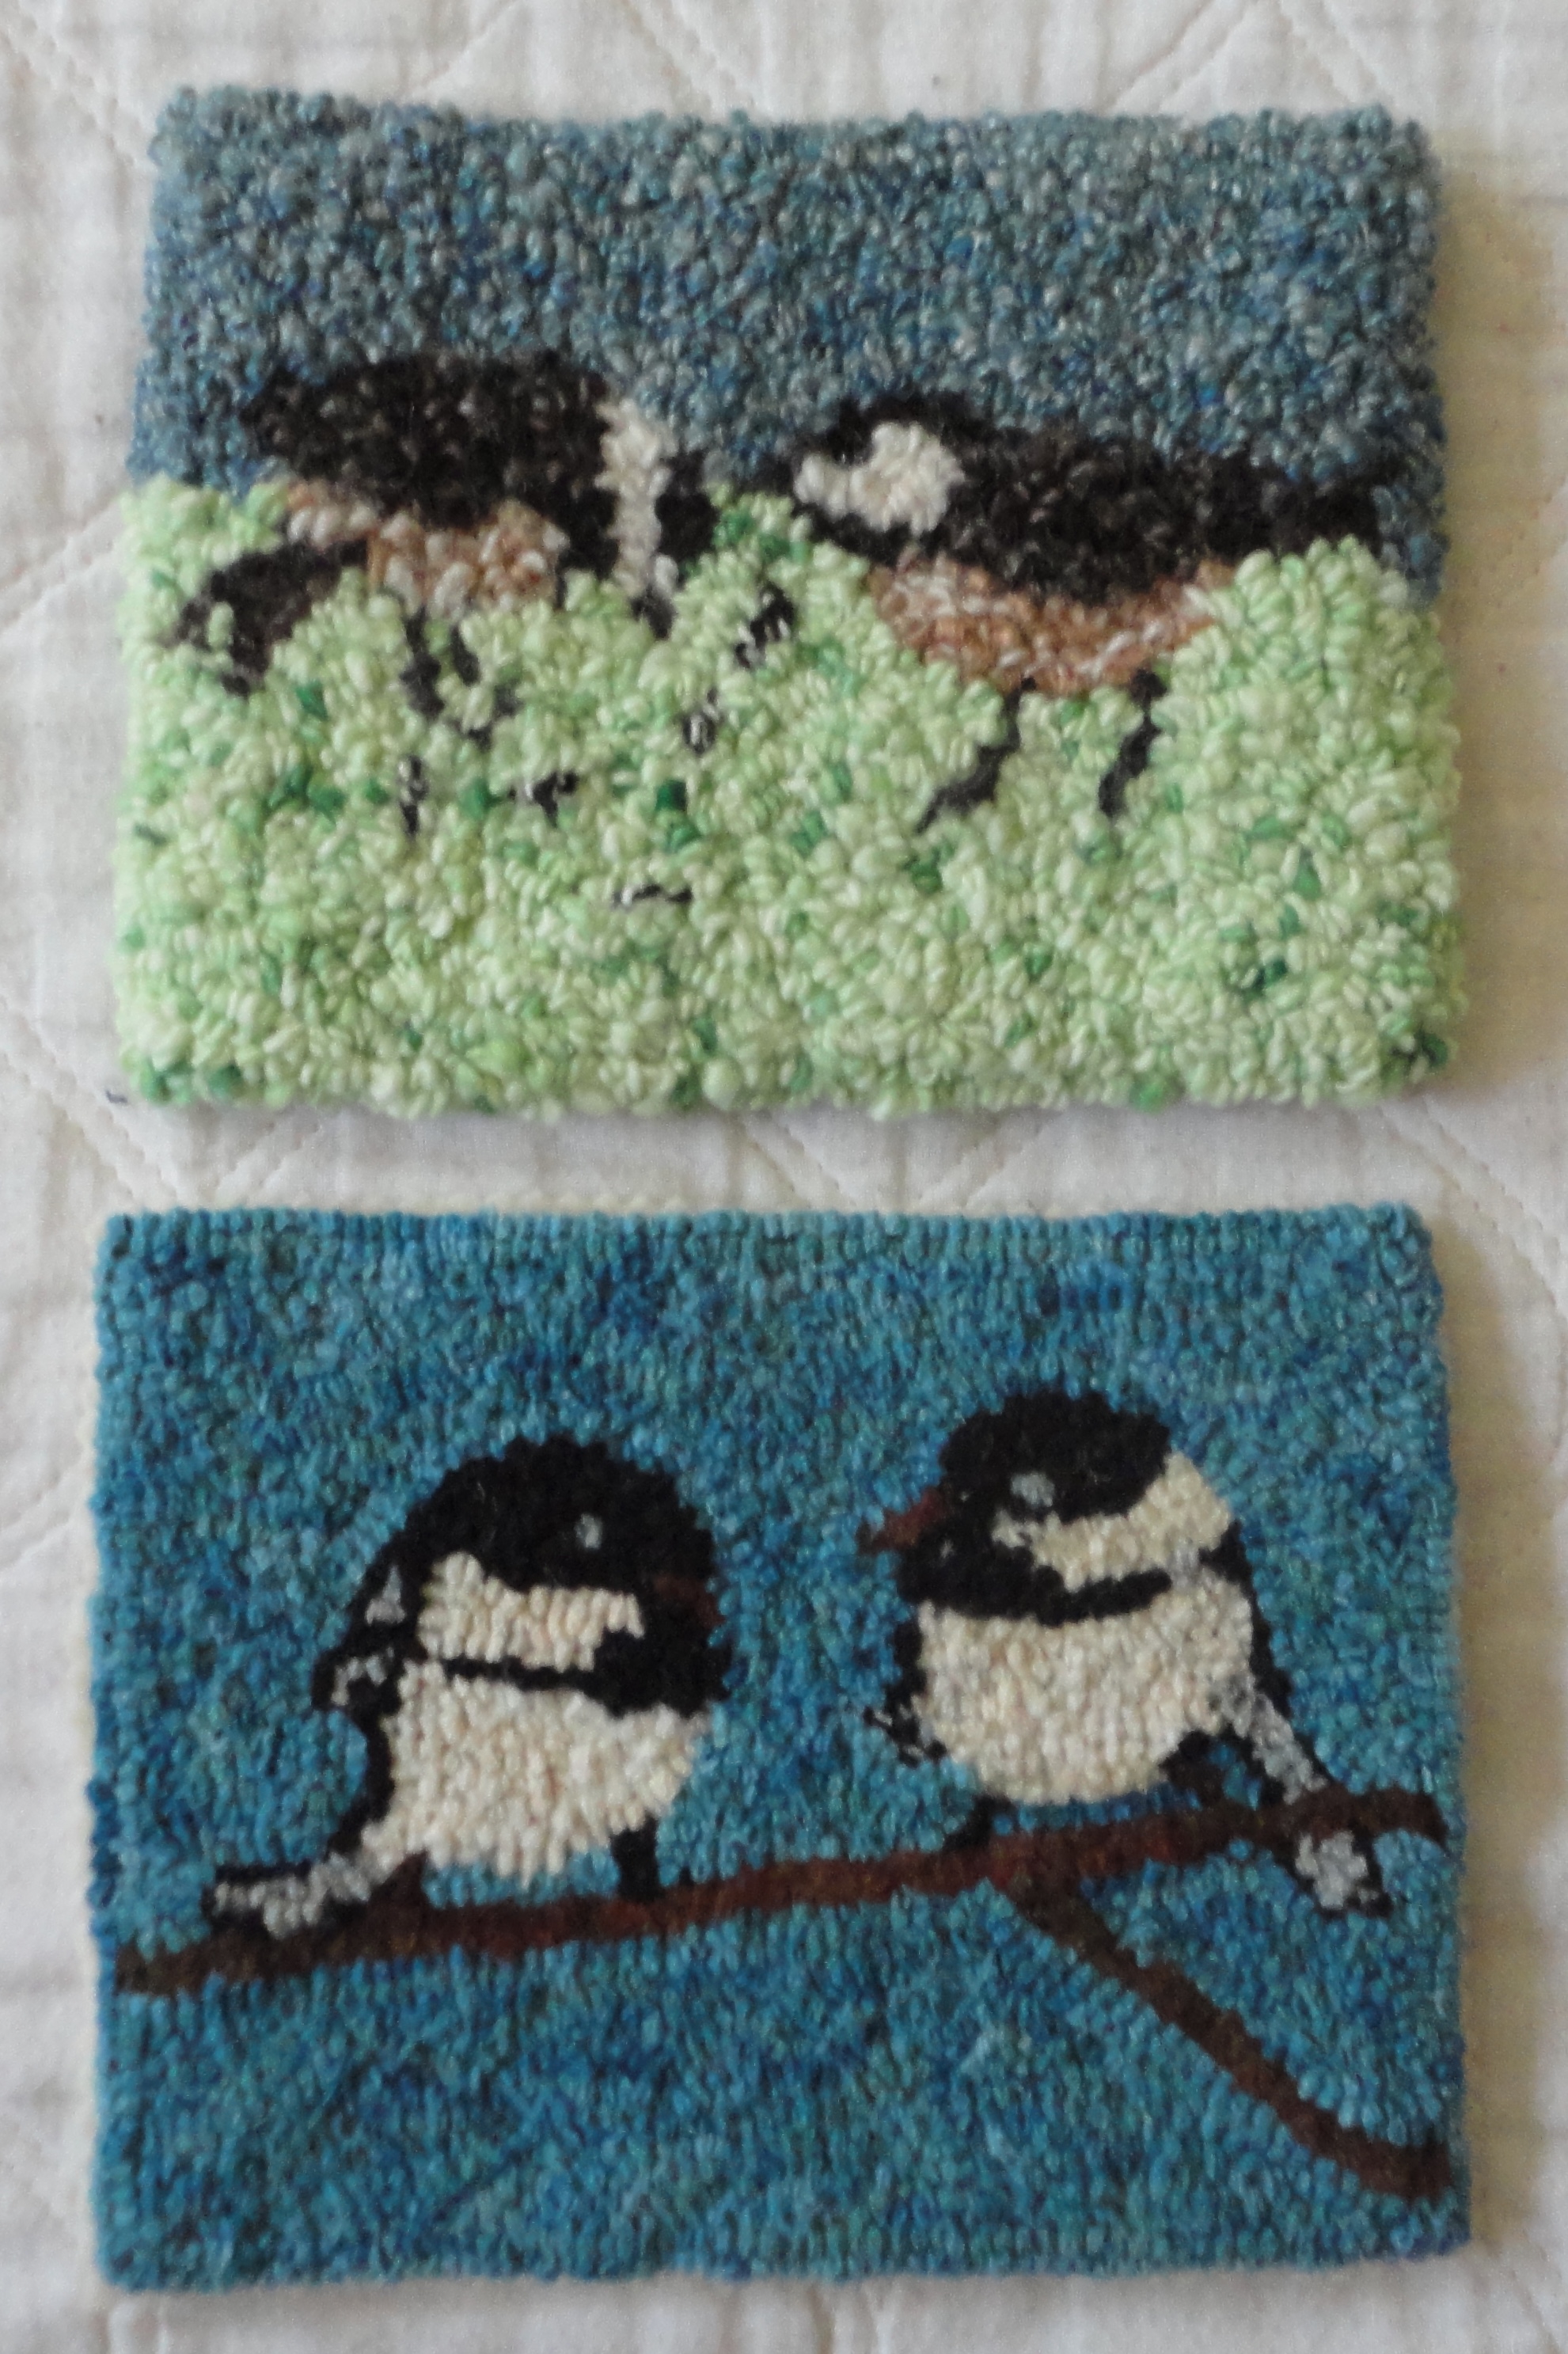
Ellen’s rugs also often had 2 birds within her rugs. 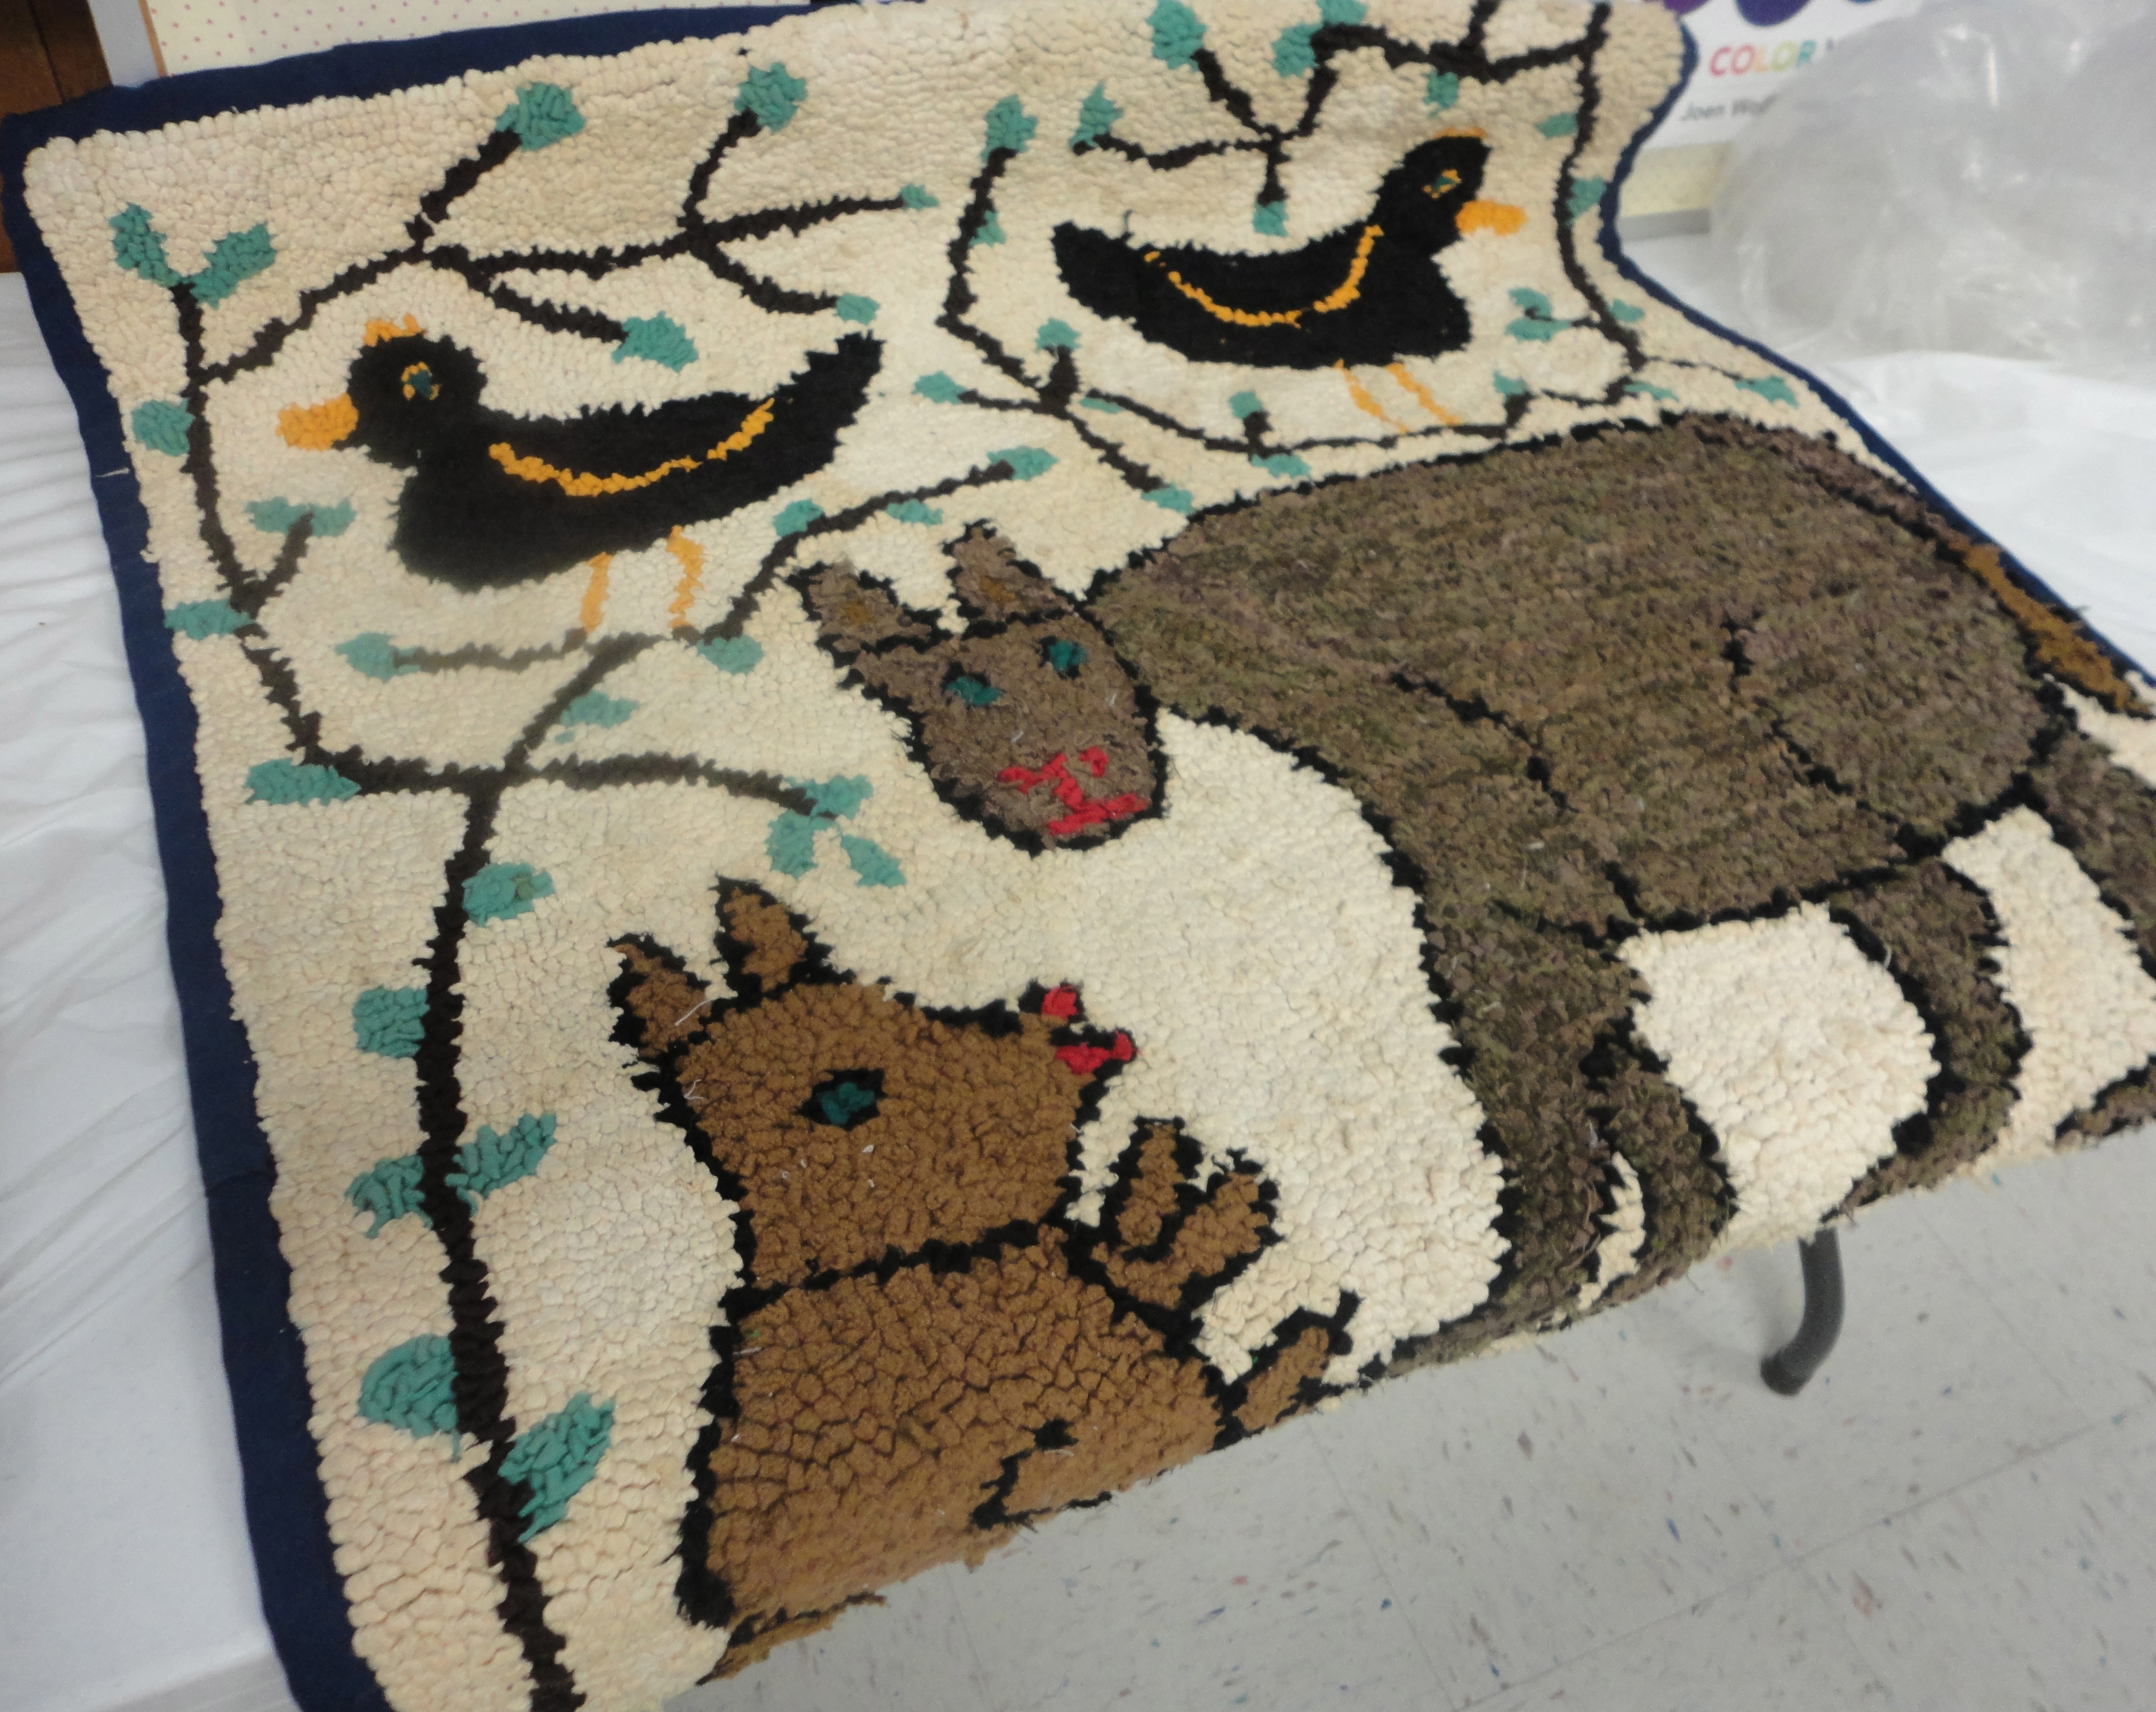 The story passed on was that this comes from a poem: “One for Sorrow”. John remembered it was “One for sorrow, Two for joy, but was not sure of the others verses. Ellen included the images of 2 to represent “Joy” within her hooking.
Ellen’s father was a carpenter who was born at sea on the ship his father was captain of. Ellen lived near the ocean in a salt-marsh farmhouse for much of her life. She also had a brother who drowned at sea. So it wasn’t surprising to see ships in many of her pieces. What caught many’s attention were the works with what appeared to be swimming sailors around the ships.


Ellen wasn’t afraid to hook in the natural state either here or in her Adam and Eve/Tree of Life rugs. 
 John recalls this rug as being inside the door of Ellen’s home. The family used their rugs throughout the house, but also hooked over the winters to have rugs to trade for linoleum mats/rugs. Interesting how they saw more value in the linoleum than their hand-made pieces.
Ellen sounded very self sufficient – growing her own food, raising food animals 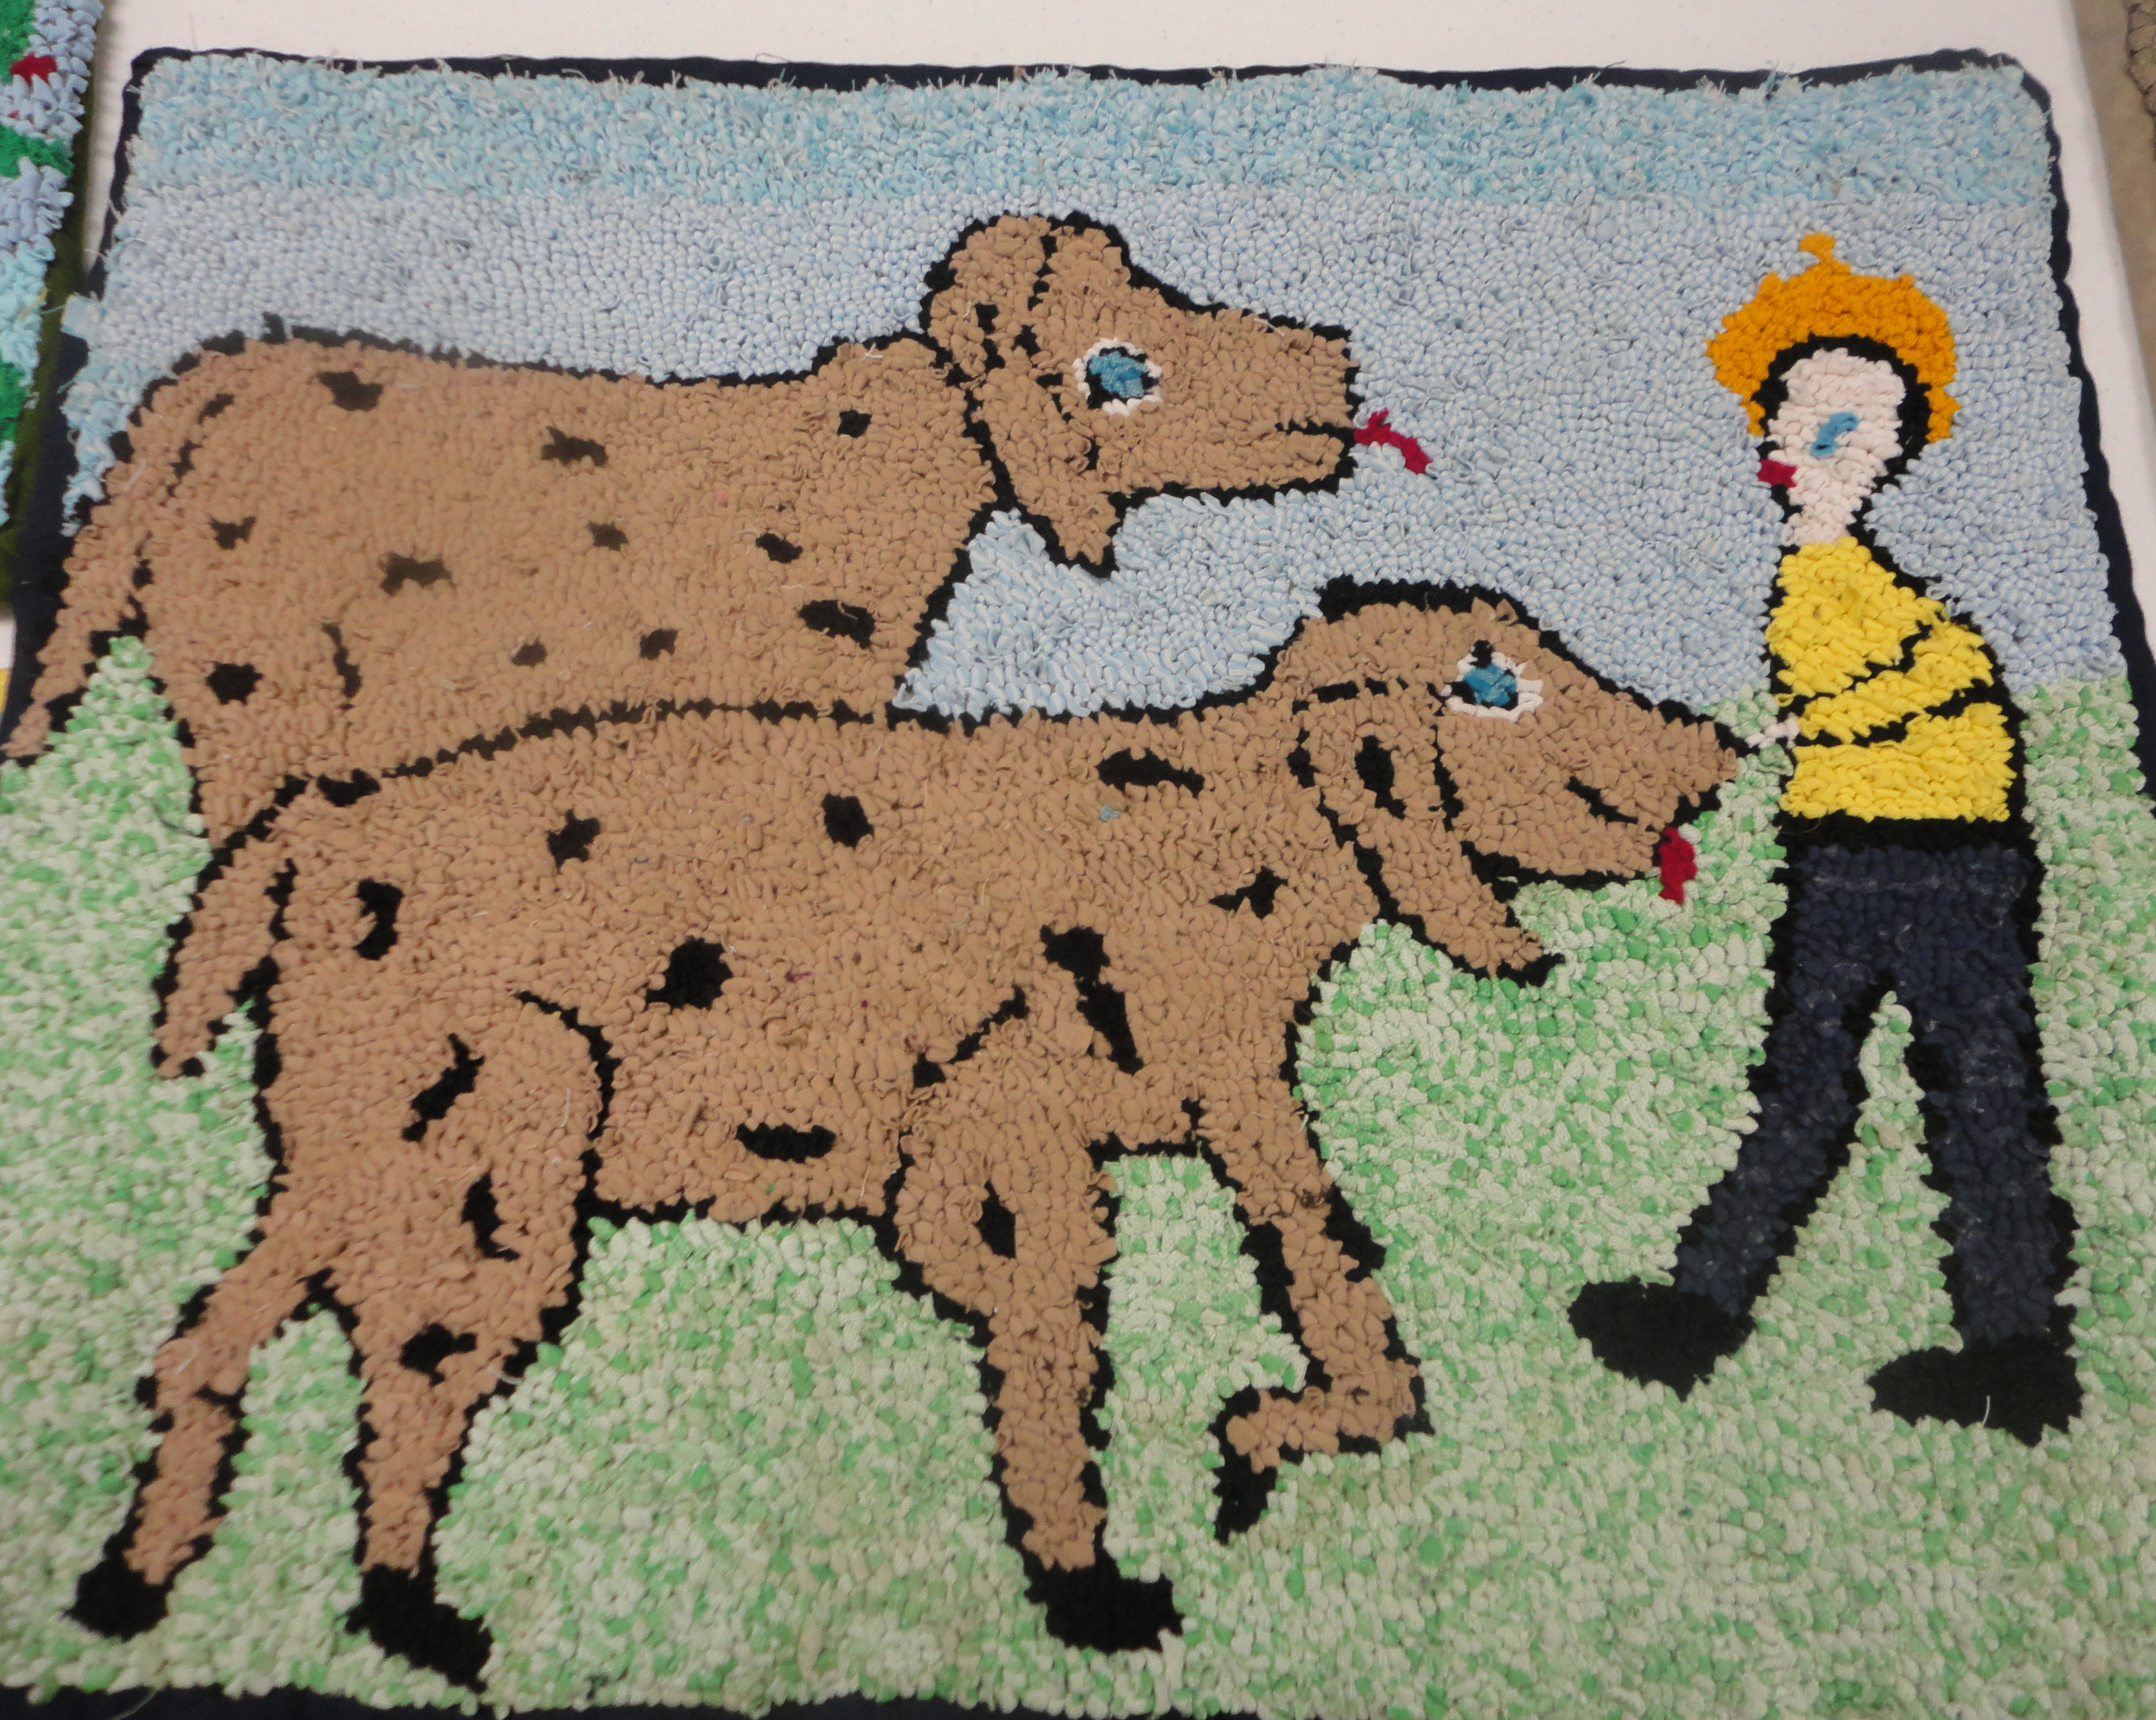 (2 cows with those green eyes), and bartering rugs. John had a pencil drawing showing Ellen chopping her own wood. Ellen started selling her rugs when she found herself a widow caring for her two grandsons. She also did some commissioned work. John told us that The Tree of Life was a design Ellen hooked many times with many of them being commissioned.
  John had a gallery/shop that sold some of her work (never taking a consignment fee). When asked about her prices John responded “It depended on who you were.” Ellen would barter for goods with friends or charge money with strangers.
Ellen did some pieces which included herself within her community.  As one would expect with this primitive folk art style the figures are not in proportion. Ellen’s use of outlining with black was also interesting. There were times that it appeared she ran out of black, because the outlining just stopped.
Ellen hooked into her eighties passing at age 87. Most of her pieces were not signed. John had one with an “ES” in the lower corner. John remembered her hooking on a frame made of four wooden boards and C-clamps rested against the kitchen table or the edge of the couch in the kitchen room.  I got to try one of her hooks with aged metal shaft and well-worn wooden handle. Hooking a #8 strip it worked just fine. Ellen also knit (find some gloves knit for John in a photo above – clue look for the cat and eagle). In talking with John afterwards about Ellen’s creativity he told me she had crocheted her own wedding gown. She truly sounded like an interesting and many talented lady.
Her work has been included in museum/gallery exhibitions in Canada and Internationally, but she is not very well known. John is very willing to share his knowledge of Ellen’s life and the collection of her rugs he has.  Upon getting a check for $500 from a museum Ellen asked John for help. She did not understand what the check was for as she had gotten her rugs back, nothing sold. She asked John what to do. He helped her cash the check as she had no bank account.
~~ ~~ ~~ ~~ ~~
After meeting John at an event around Art Inspired Knits, Elaine Eskesen, author of “Dyeing To Knit” and owner of Pine Tree Yarns opened in 1990 in Damariscotta, Maine (now added Wool for Knitters and Hookers Rughooking Supplies), became inspired to try rug hooking seeing Ellen’s work. After becoming involved with rug hooking communities in Canada, studying under different teachers and following her love of color Elaine has taken her original inspiration point and is creating …


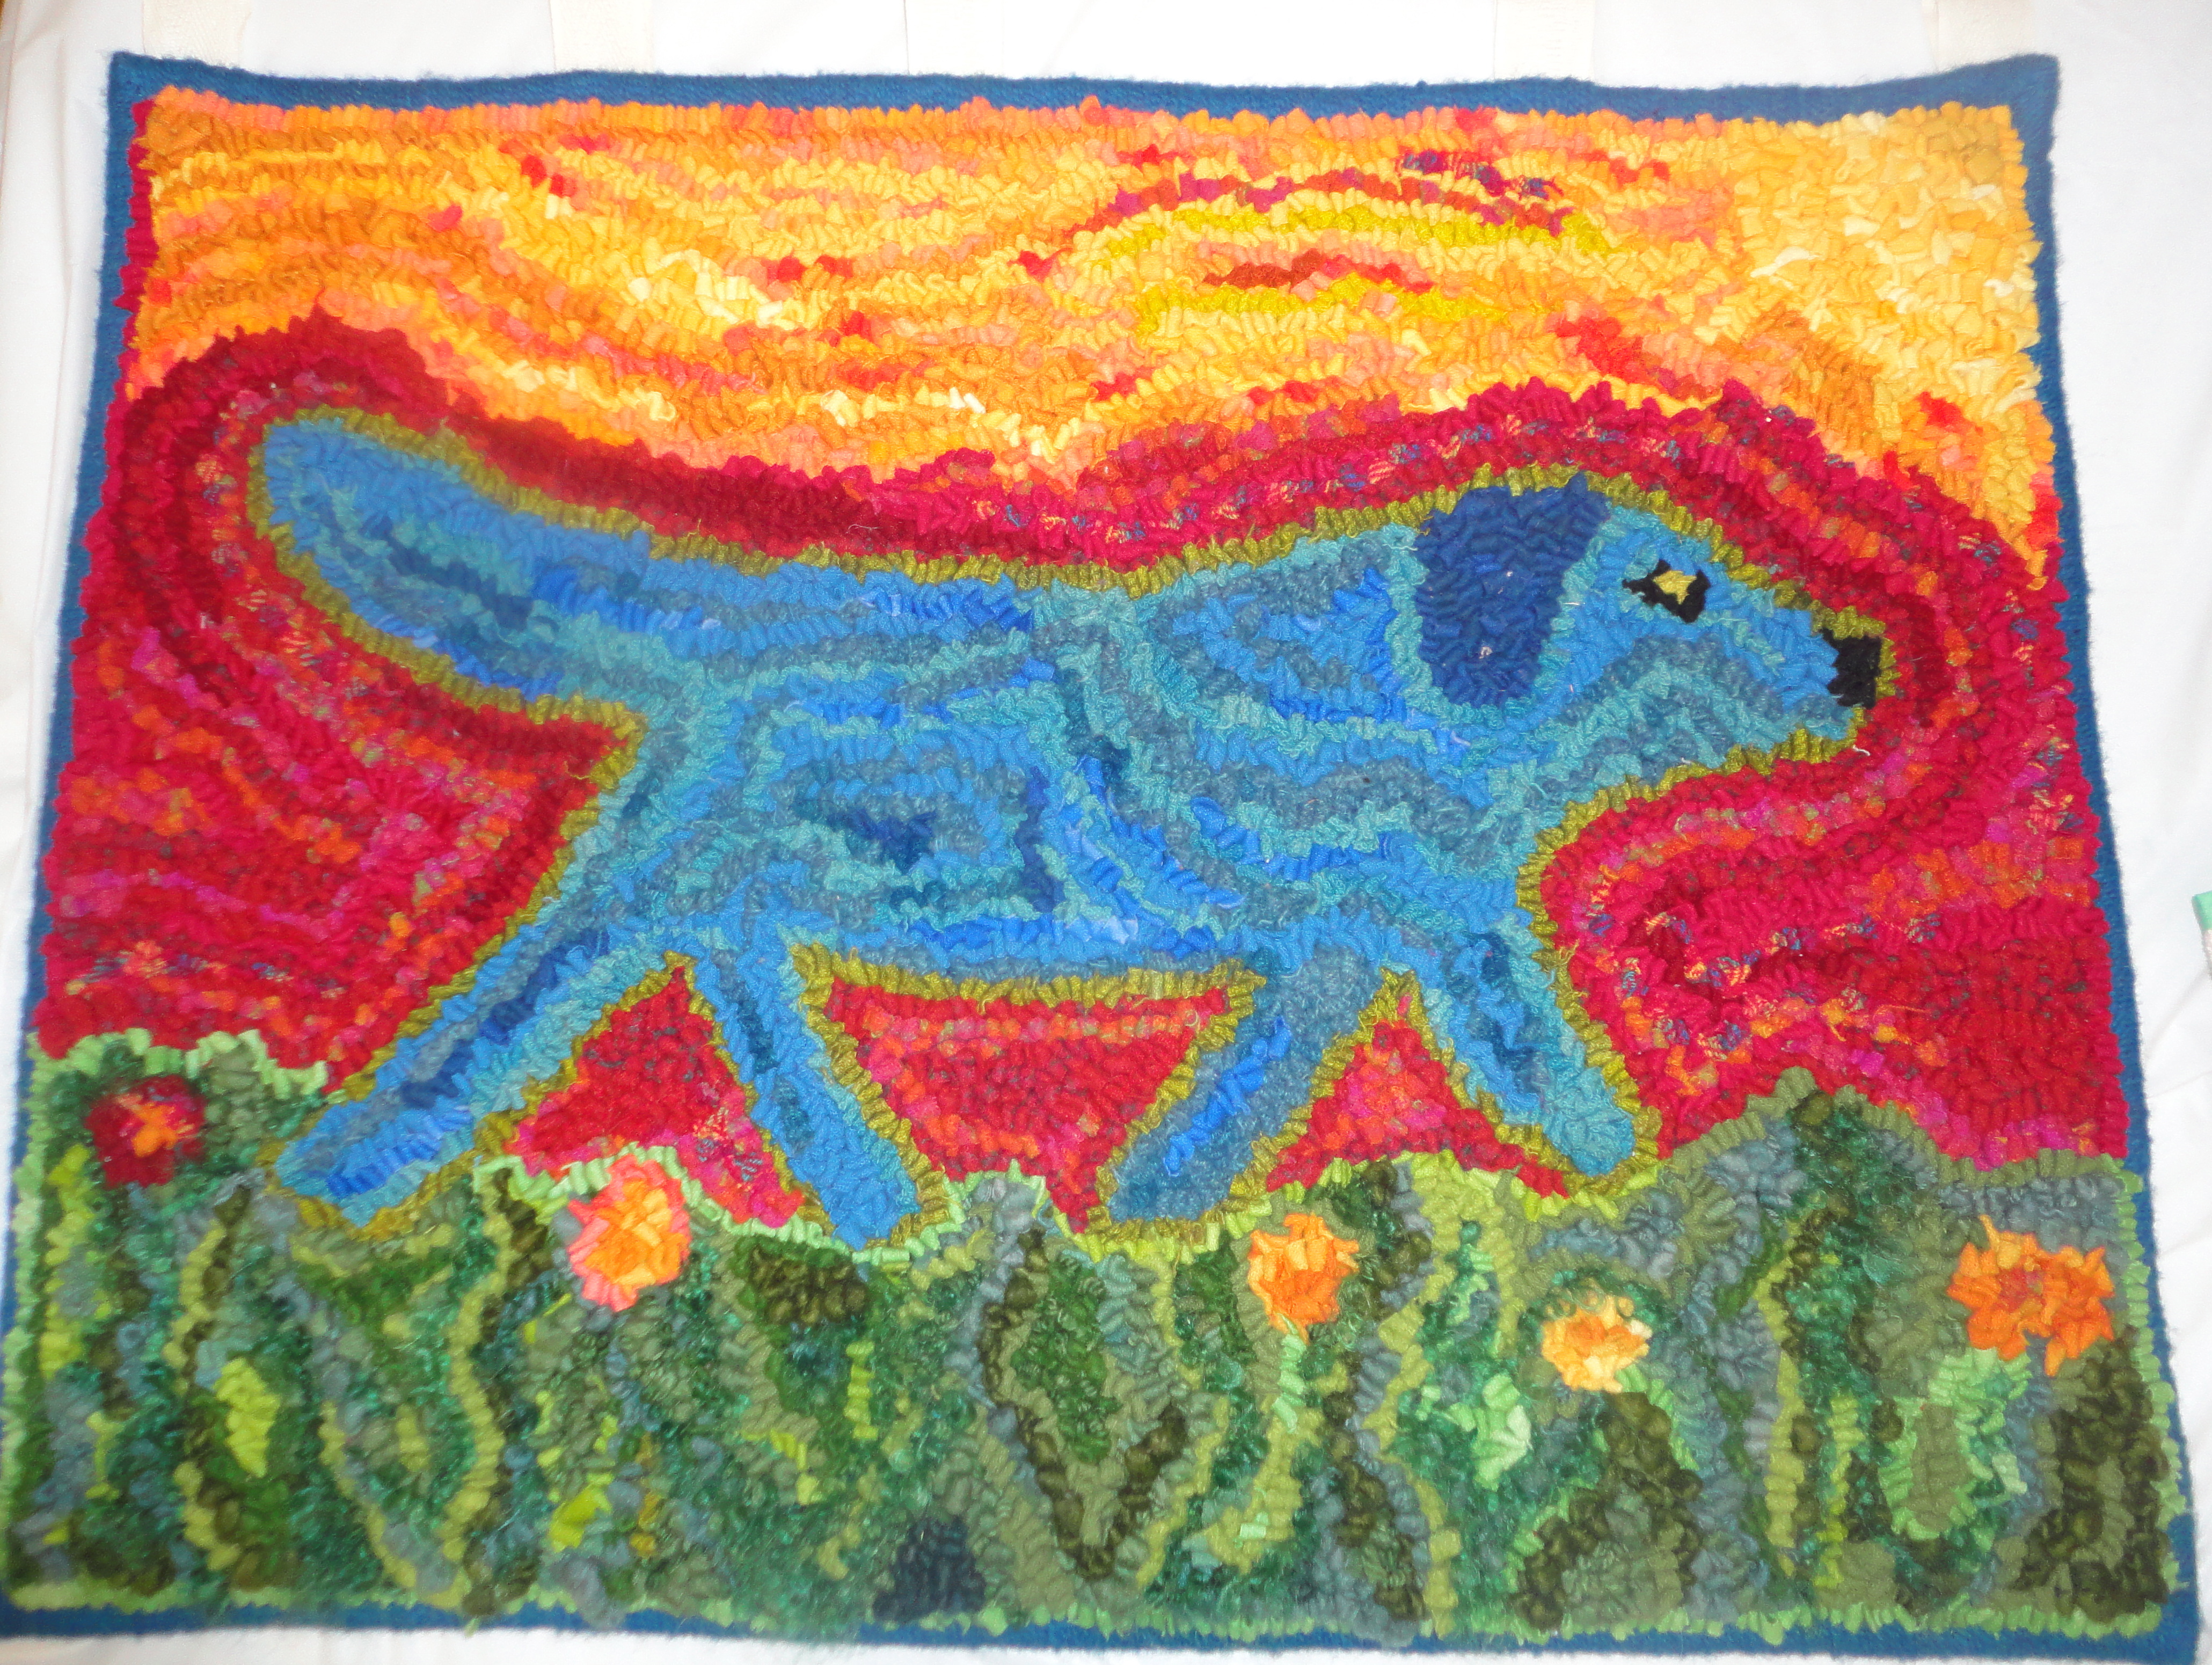

It was fun to hear how she cannot draw. She paints out her design and then John has been drawing them on the foundation. Elaine is highly allergic to burlap, so hooks on linen. A TP suggested for her to try painting directly onto the foundation and then just hooking. Elaine found that interesting. She has been primarily hooking #8 but is starting to work smaller. Having been initially taught in Canada she worked in yarn, but is now enjoying working with wool strips. Fun story on her “Dog” rug. Her daughter who lives in New York was having apartment trouble because of her dog. To help, Elaine suggested the dog come to stay in Maine over the summer. Without seeing the dog, she designed what she expected. She joked that dog is still in Maine.
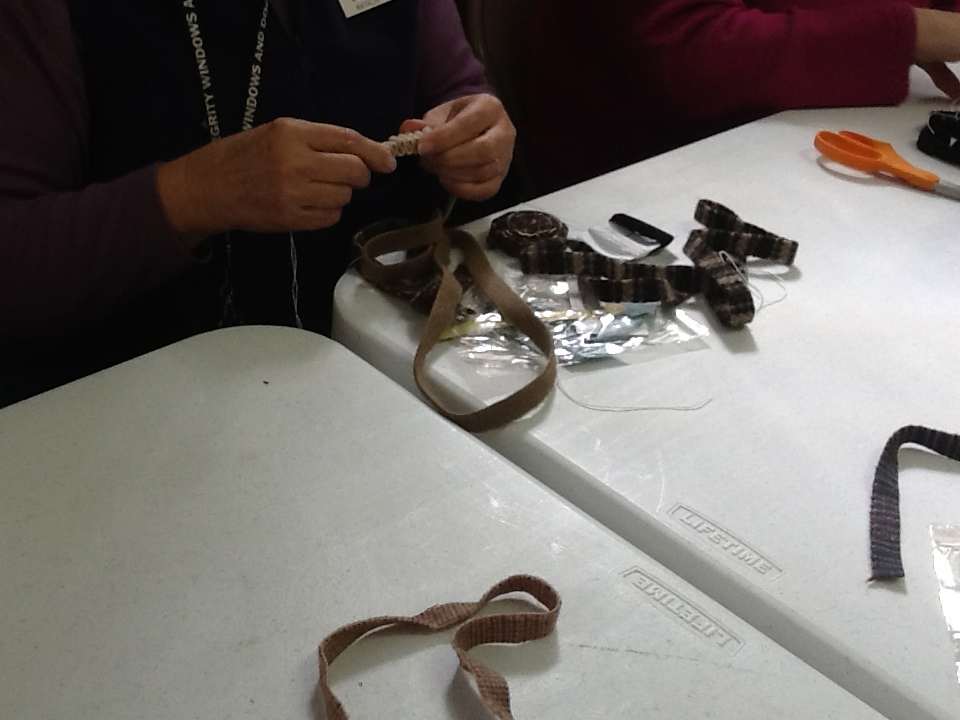
At our Nov. meeting Rose Ann Hunter presented on Heirloom Rug Techniques Traditional Rug Making 1790-1850
As her site mentions, Ruth Ann was chosen in 2005 as craftperson-in-residence at Old Sturbridge Village. She lectures at various museums, conferences and guilds throughout New England and the US. Ruth Ann has adapted and developed over 30 techniques of rug making.
For this presentation she shared rugs and other handcrafted items showing many of these various techniques. Part of the presentation was explaining her journey in rug making and researching these rug making techniques.
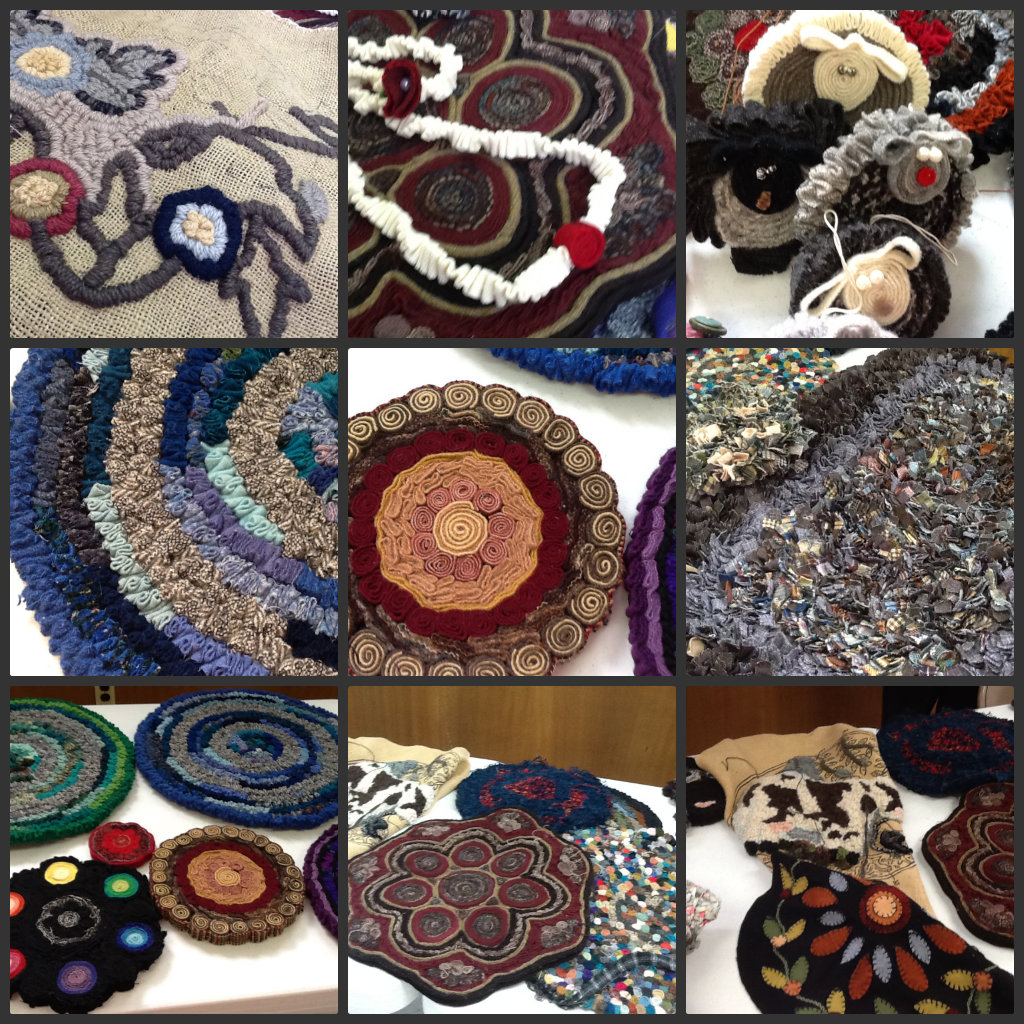
Following the general presentation Ruth Ann offered a mini workshop where members were able to experience first hand (with guidance) some of the basic techniques while making a small sheep hanging or ornament.


~~~~~~~~~~~~~~~~~~~~~~
If interested in information on standing wool techniques check out these linked YouTube video demonstrations by our current President: Stitching a Standing Wool Mat (Part 1) Stitching a Standing Wool Mat (Part 2) also found in our How To page.
Our How To page also has a written description for making a Shirred Rug from a Tin Pedlar member.
